ClickHouse
Prerequisites
- ClickHouse version
21.3.10.1or later.- A dedicated read-only Zenskar user with access to all tables needed for replication.
🐕🦺 Setup guide
⚙️ Step 1: make your database accessible to Zenskar
The steps needed are dependent on your networking setup. The easiest way to verify if Zenskar is able to connect to your ClickHouse instance is by configuring a data source in the UI.
⚙️ Step 2: create a dedicated read-only user with access to the relevant tables (optional but recommended)
This step is optional but highly recommended to allow for better permission control and auditing. Alternatively, you can use an existing user in your database.
To create a dedicated database user, run the following commands against your database:
CREATE USER 'zenskar'@'%' IDENTIFIED BY 'your_password_here';
Then give it access to the relevant schema:
GRANT SELECT ON <database name>.* TO 'zenskar'@'%';
You can limit this grant down to specific tables instead of the whole database. Your database user should now be ready for use with Zenskar.
⚙️ Step 3: set up data source and type
- Log into your Zenskar account.
- In the left navigation bar, click Metering > Data Sources.
- In the top-right corner, click + ADD DATA SOURCE.
- In the Set Up Source section of the Add New Data Source page, enter a name for the ClickHouse data source connection.
- Select ClickHouse from the Source Type drop-down menu.

⚙️ Step 4: configure data source
In the Source Config section of the Add New Data Source page, fill in the following details:
- Host: the host name or address of the server hosting ClickHouse.
- Port: the port number of the SQL interface of the server hosting ClickHouse.
- Database: the database name.
- Username: the username to be used to connect with the database.
- Password: the password of the user.
- JDBC URL Parameters (Advanced): refer this.
- SSH Tunnel Method: choose No Tunnel if you do not want to connect via SSH tunneling.

⚙️ Step 5: configure connection via SSH tunnel method
You can connect to a ClickHouse server via an SSH tunnel.
When using an SSH tunnel, you are configuring Zenskar to connect to an intermediate server (also called a bastion or a jump server) that has direct access to the database. Zenksar connects to the bastion and then asks the bastion to connect directly to the server.
To connect to a ClickHouse server via an SSH tunnel, do the following:
- Choose Key Authentication if you wish to use an RSA private key as your secret for establishing the SSH tunnel.
- Choose Password Authentication if you wish to use a password for establishing the SSH tunnel.
Key authentication
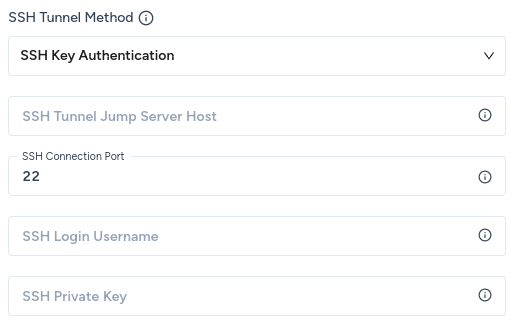
- SSH Tunnel Jump Server Host: the hostname or IP address of the bastion server that Zenskar will connect to.
- SSH Connection Port: the port on the bastion server to establish the SSH connection. The default port for SSH connections is
22. Unless you have explicitly changed the SSH port, go with the default. - SSH Login Username: the username that Zenskar should use to connect with the bastion server.
Note
The SSH Login Username is not the same as the ClickHouse database username.
- SSH Private Key: the RSA private key that you wish to use to establish the SSH connection.
Password authentication
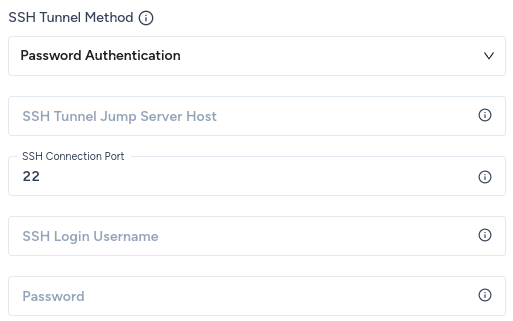
- SSH Tunnel Jump Server Host: the hostname or IP address of the bastion server that Zenskar will connect to.
- SSH Connection Port: the port on the bastion server to establish the SSH connection. The default port for SSH connections is
22. Unless you have explicitly changed the SSH port, go with the default. - SSH Login Username: the username that Zenskar should use to connect with the bastion server.
Note
The SSH Login Username is not the same as the ClickHouse database username.
- Password: the password of the user that Zenskar should use to connect with the bastion server
Note
The Password is not the same as the ClickHouse database password.
Generating a private key for SSH Tunneling
The connector expects an RSA key in PEM format. To generate this key:
ssh-keygen -t rsa -m PEM -f myuser_rsa
This produces the private key in pem format, and the public key remains in the standard format used by the authorized_keys file on your bastion host. The public key should be added to your bastion host to whichever user you want to use with Zenskar. The private key is provided via copy-and-paste to the Zenskar connector configuration screen, so it may log in to the bastion.
Updated about 2 months ago