

Connect Rillet
Prerequisites
- A Rillet account with API access, and an API key generated for it. Note whether the key is for Rillet’s sandbox or production environment, since each has separate keys.
- A chart of accounts already set up in Rillet. The connector references accounts by their code and never creates them, so these must already exist: a sales or revenue account, a tax account of type Liability, and a discount account of type Income or Expense.
- If the Rillet organization has more than one subsidiary, decide which one this connection maps to.
Steps
- Log in to Rillet to generate an API key. In Rillet, select the organization in the bottom left corner, go to Organization Settings > API Access, and click + Create API Key. Copy and save the key, since you cannot view it again after this step.
-
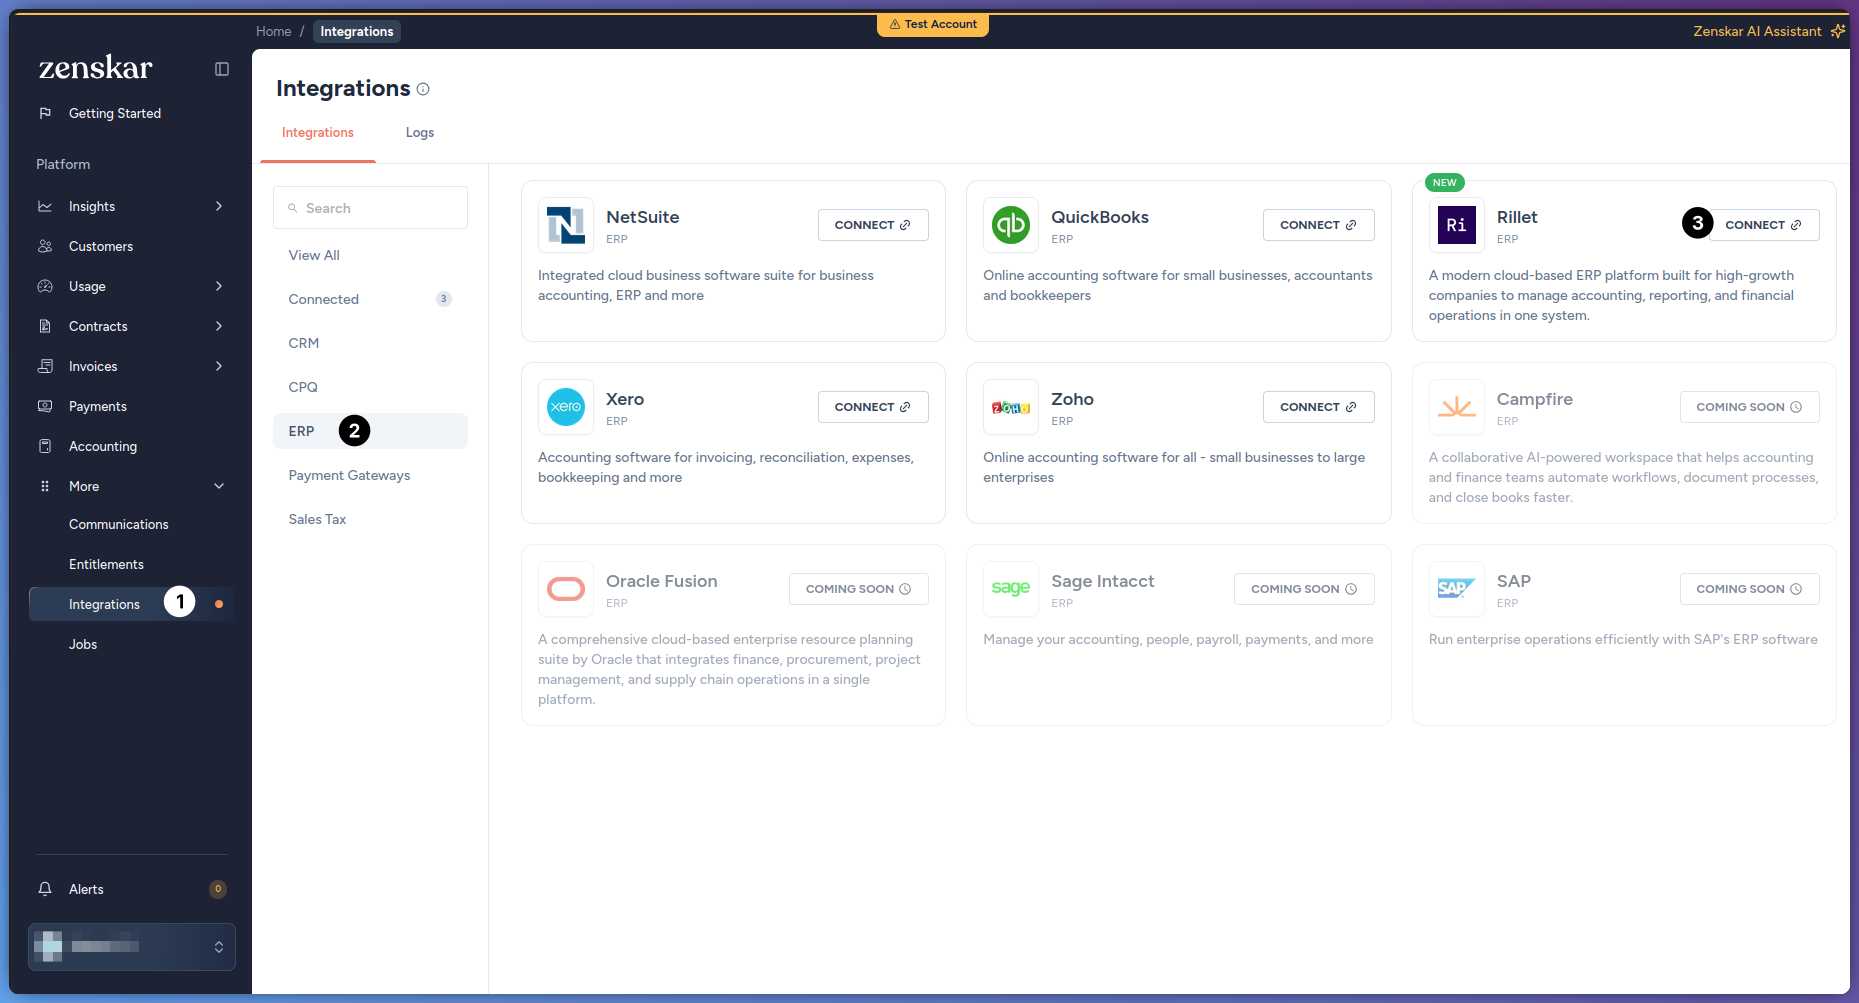
In Zenskar, go to More > Integrations > ERP, find the Rillet card, and click Connect.
-
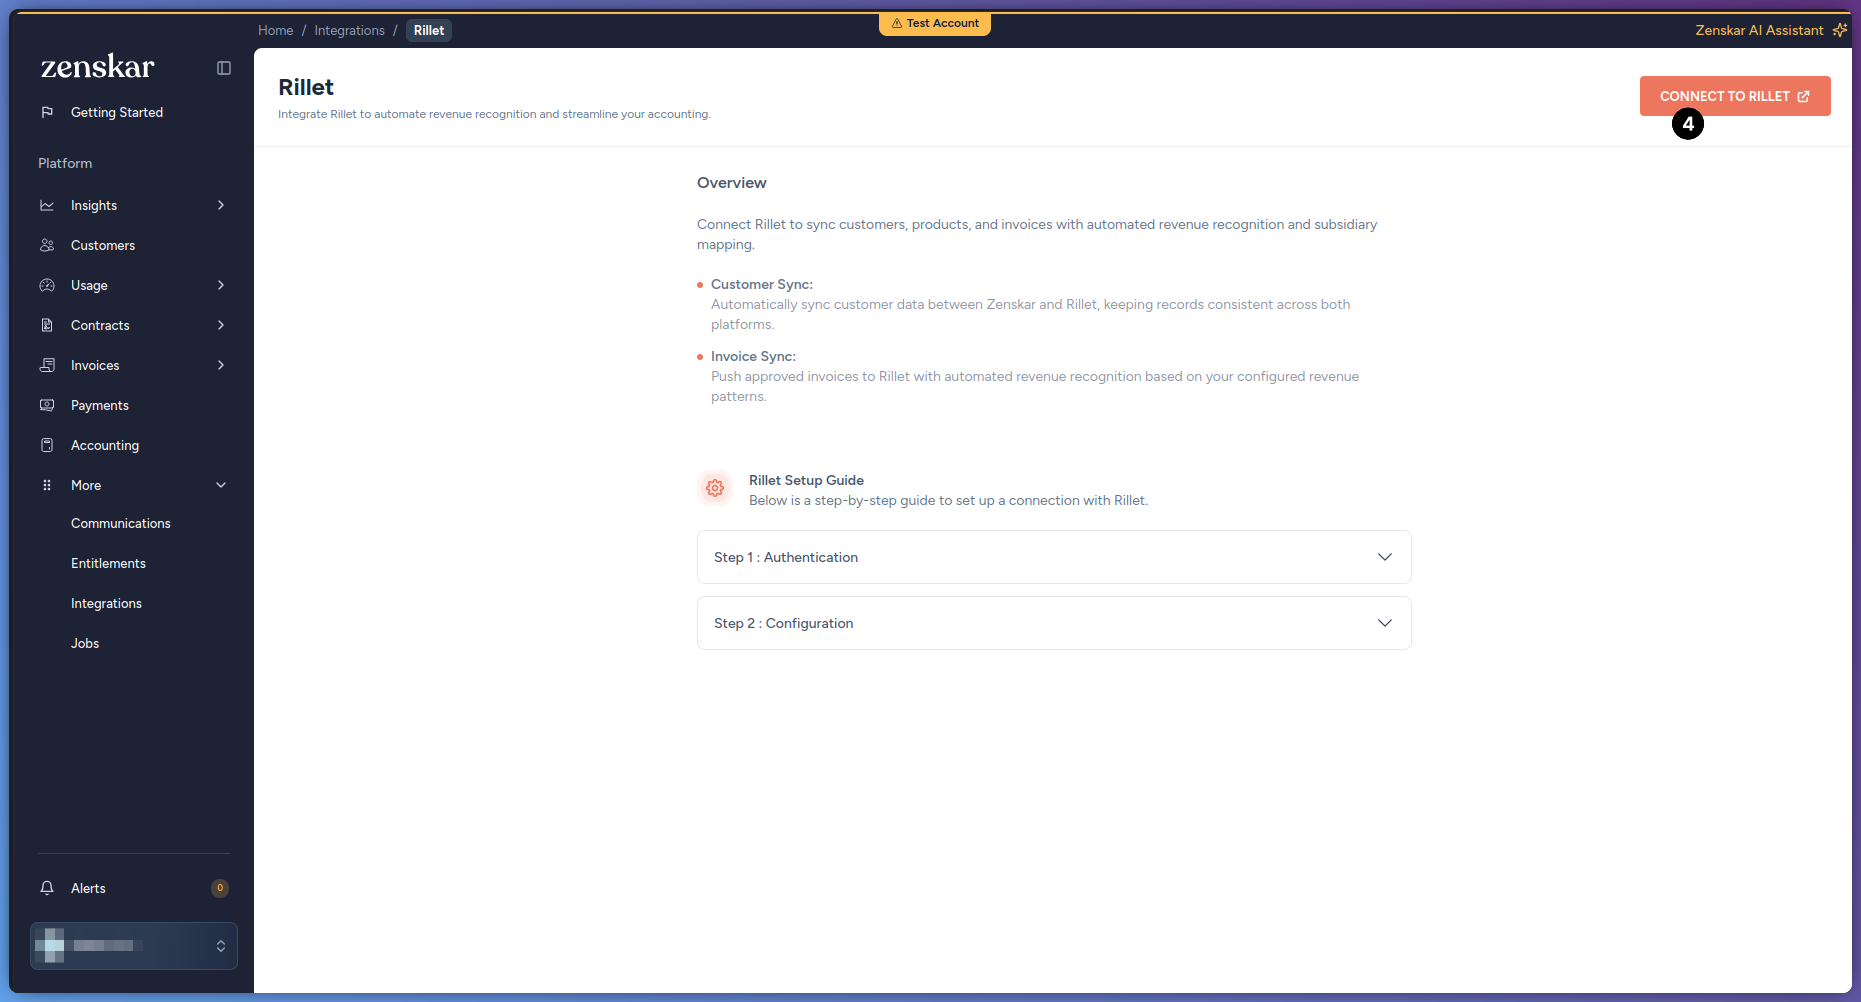
On the Rillet page, click Connect to Rillet.
-
In the dialog, fill in the following fields, then click Connect:
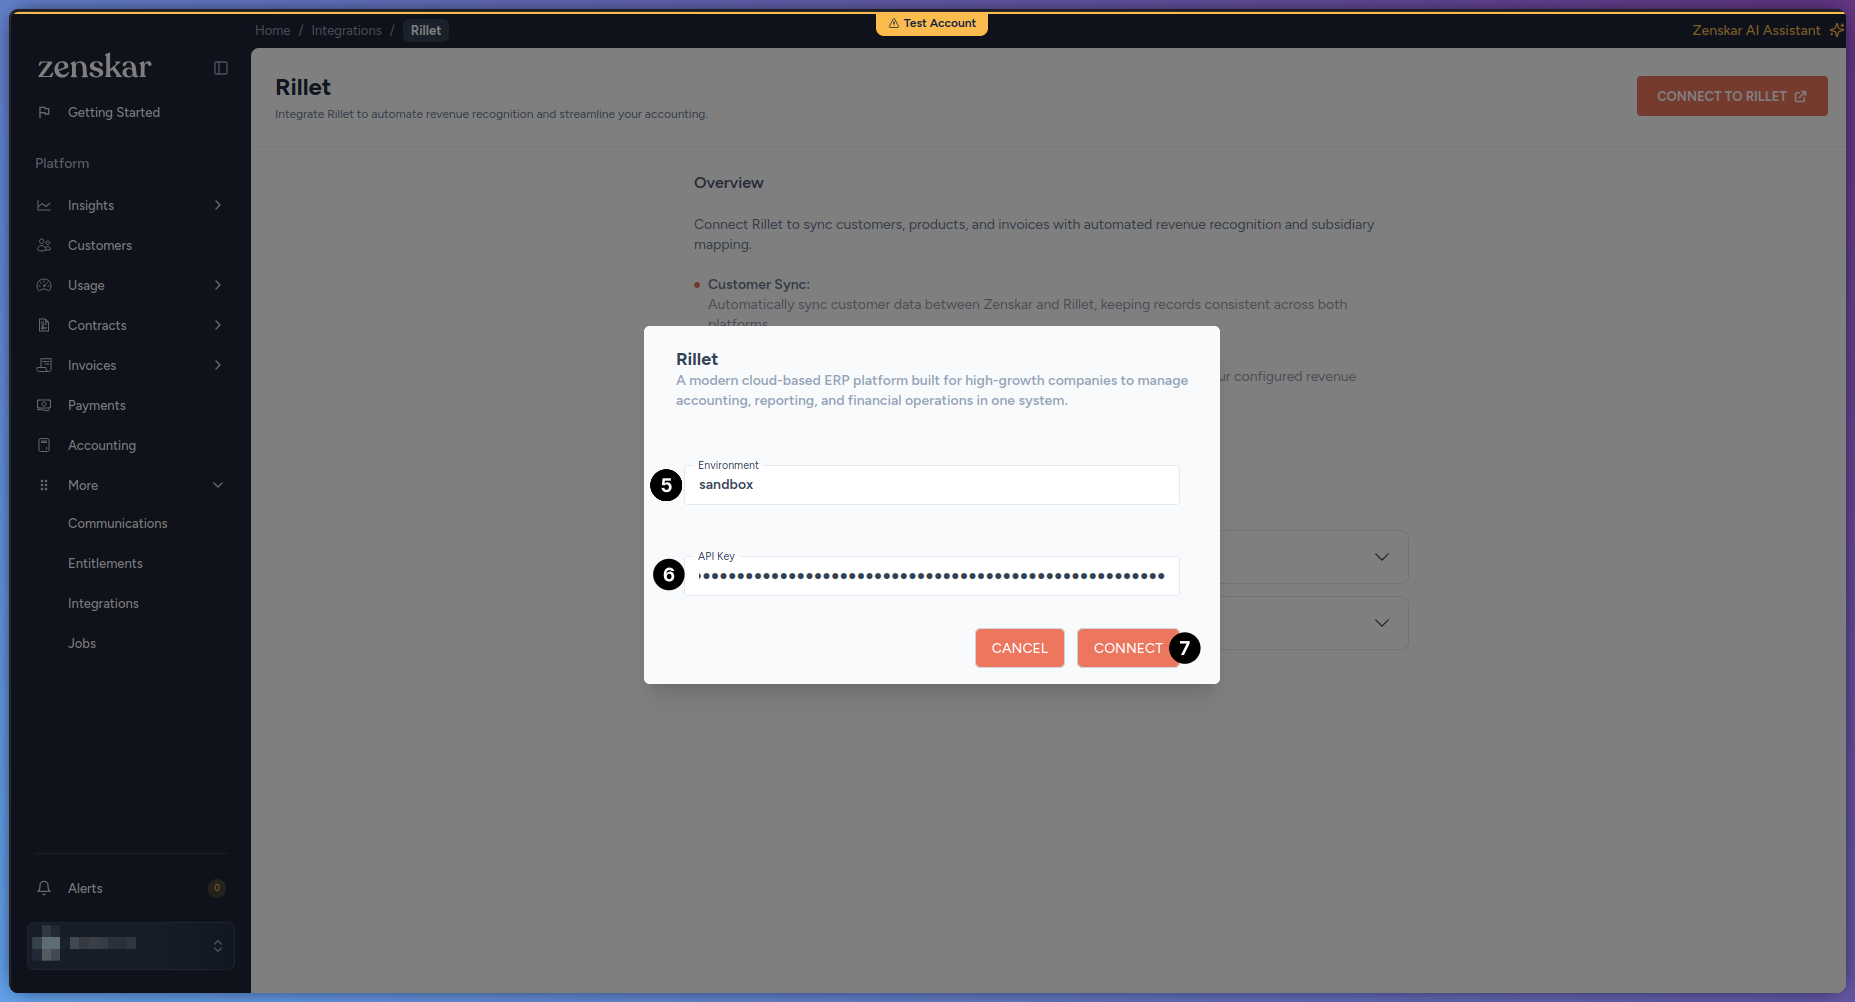 Zenskar validates the key against Rillet immediately. If the key is invalid, or does not match the environment entered, the connection does not save and Zenskar shows an error.
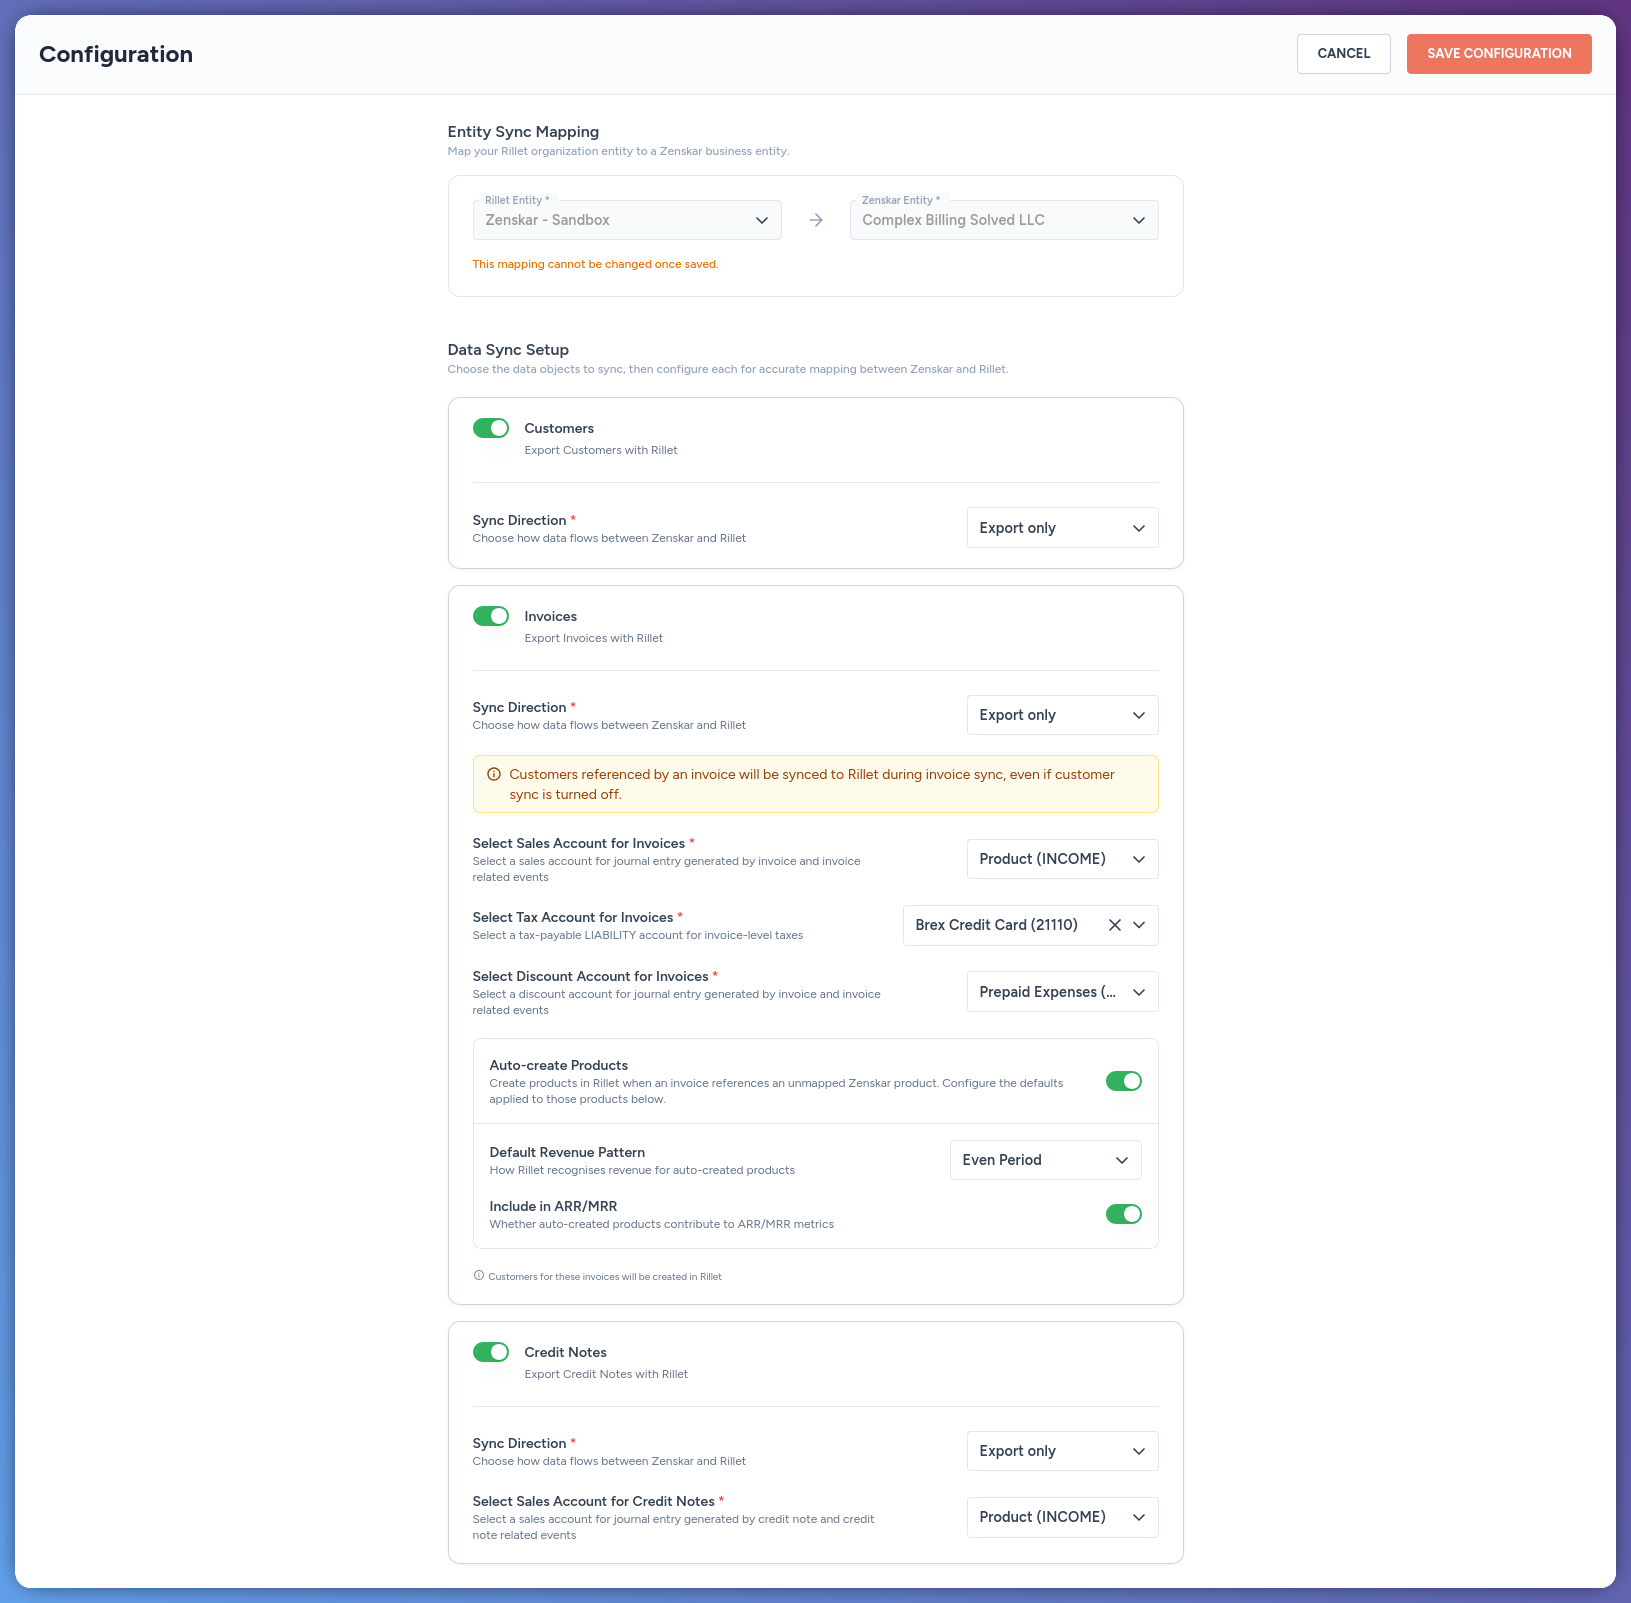
- Zenskar redirects you to the Configuration screen.
Configure the connection
-
Under Entity Sync Mapping, map the connection to a Rillet subsidiary and a Zenskar entity:
-
Under Data Sync Setup, enable the modules to sync. Every module is export only, from Zenskar to Rillet:
-
Configure the account mapping and product settings for Invoices and Credit Notes. None of these have a default or recommended value, each account must already exist in Rillet, and Zenskar does not validate the account type until sync time:
These account fields apply only to a product Zenskar creates in Rillet. A Zenskar product already mapped to an existing Rillet product keeps that product’s own account in Rillet, unaffected by this configuration. To reuse an existing Rillet product instead of creating a new one, see Map an existing product below.Customers referenced by an invoice sync to Rillet during invoice sync, even if the Customers module is turned off. Credit notes do not create the customer in Rillet, so the customer must already be synced, or the credit note sync fails. The customer’s billing country must also be set, since it determines whether Rillet applies VAT or sales tax on the credit memo.
-
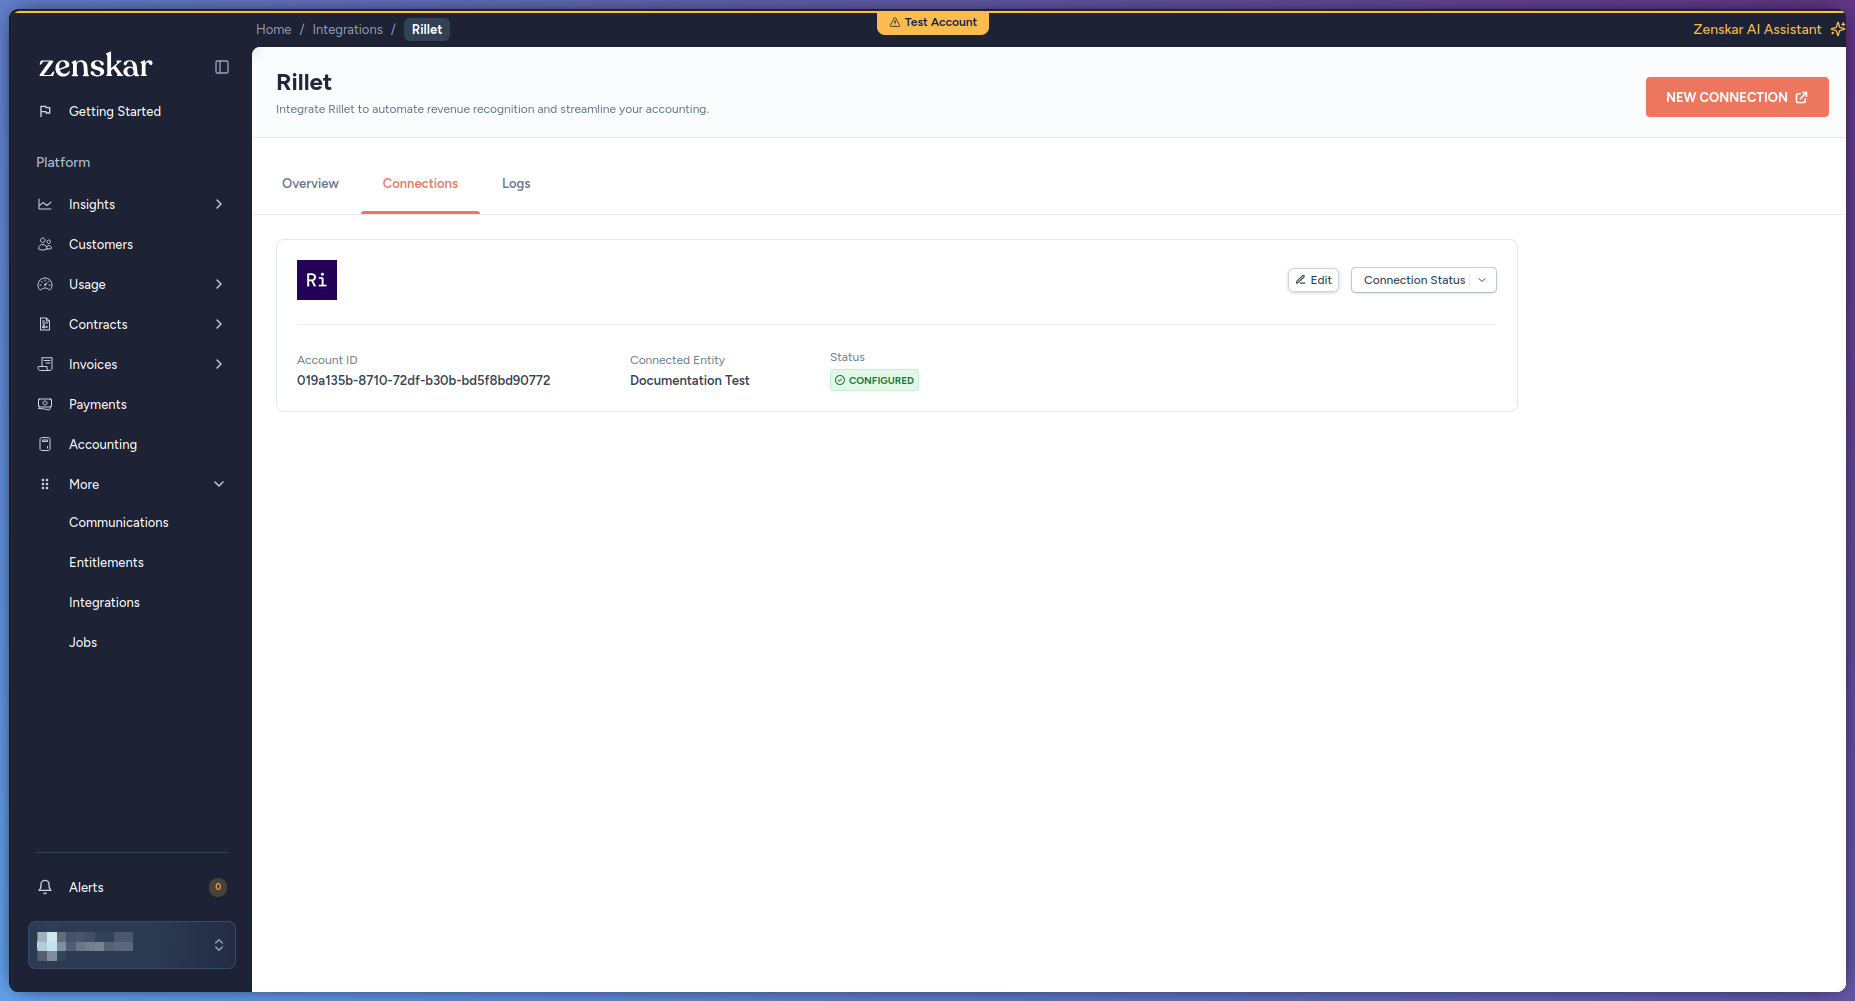
Click Save Configuration. The connection shows as Configured on the Rillet Connections tab.
Map an existing product
If a Zenskar product already exists as a product in Rillet, map them to each other before your first sync. Without this mapping, Auto-create Products creates a new, duplicate product in Rillet instead of reusing the existing one.- Go to Contracts > Products and open the product.
-
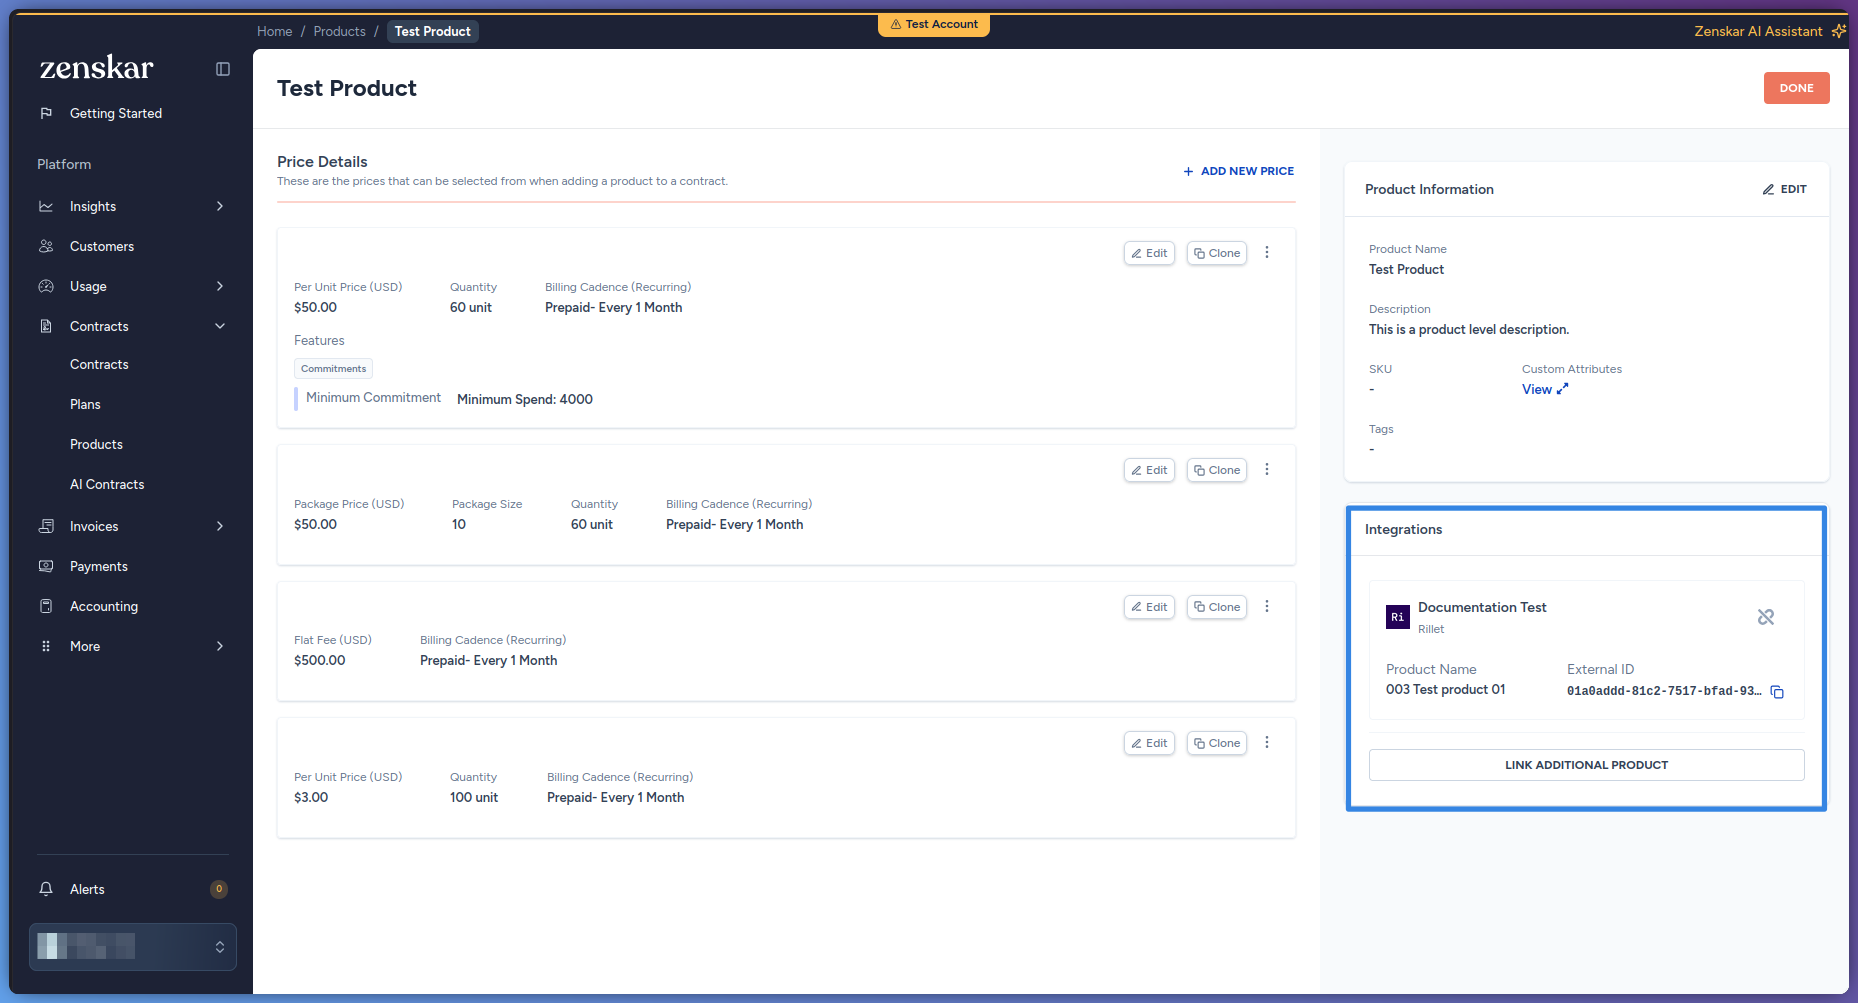
Under Integrations, click Link Product. If the product already has a mapping to another connector, click Link Additional Product instead.
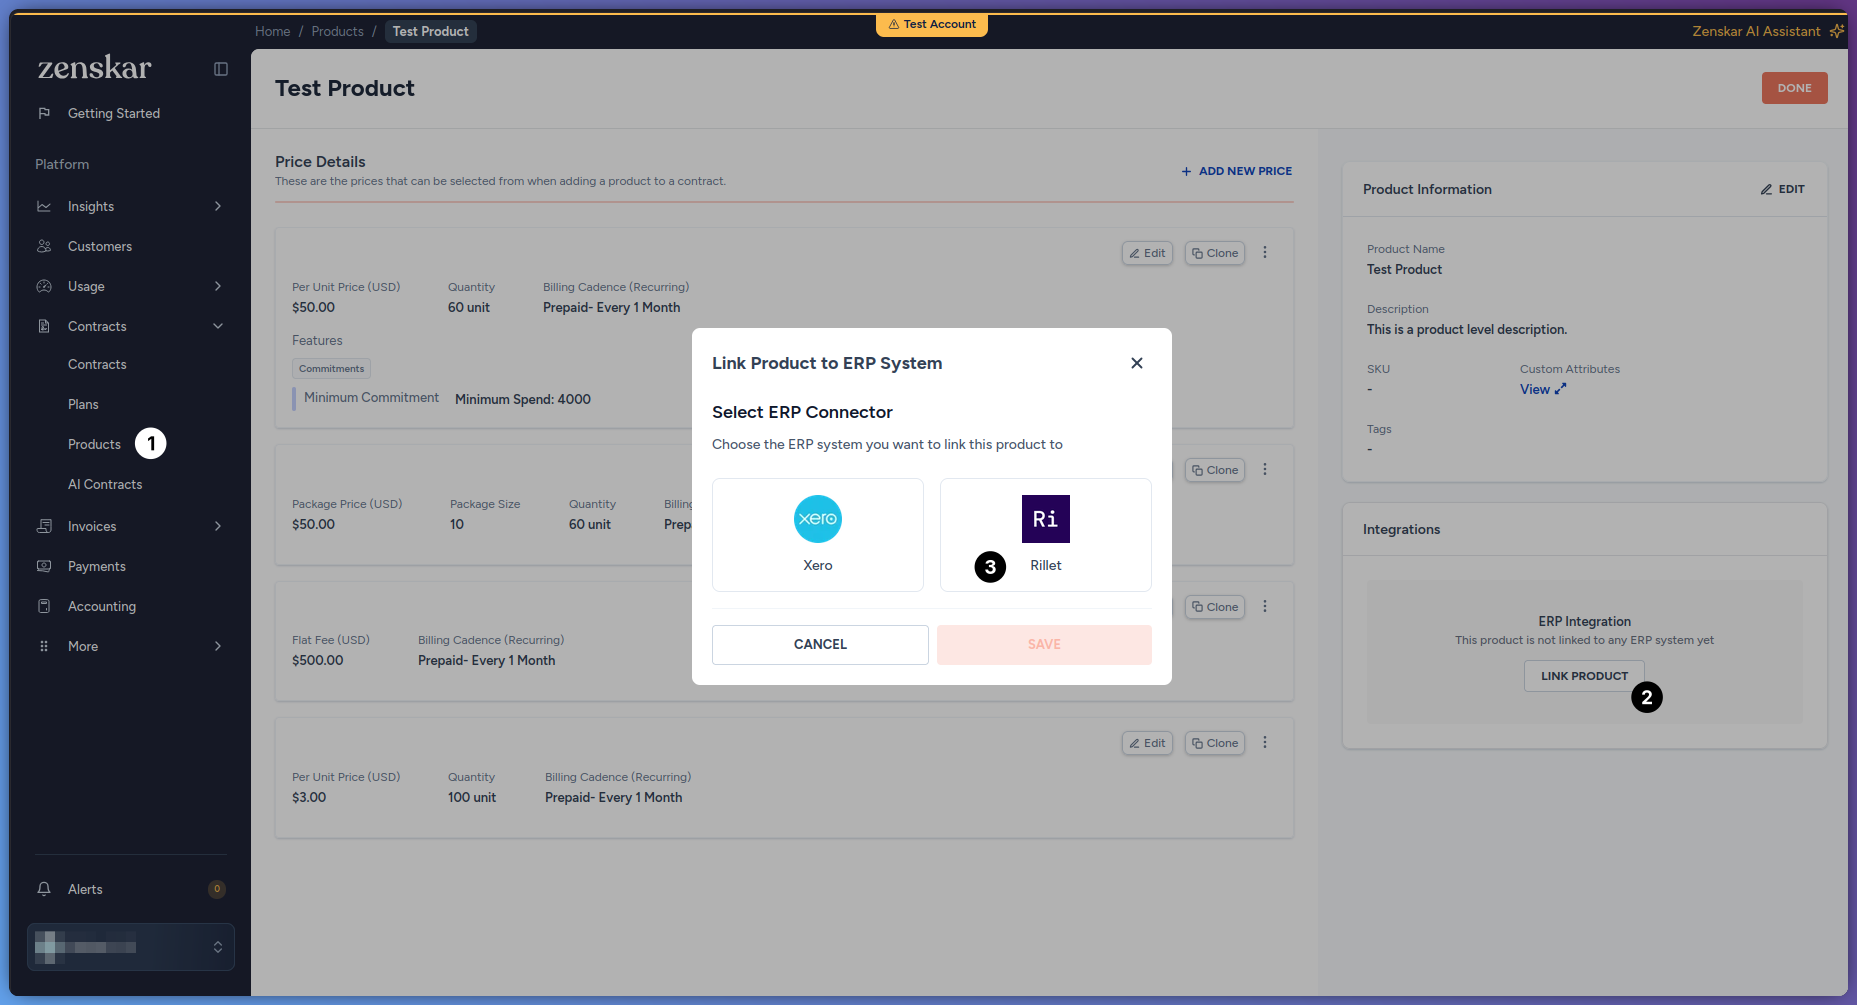
- Select Rillet as the connector, then click Save to proceed.
-
Choose the Rillet Account this product belongs to, then paste the product’s ID under Product ID in Rillet. Find this ID on the product’s own page in Rillet, in the page URL.
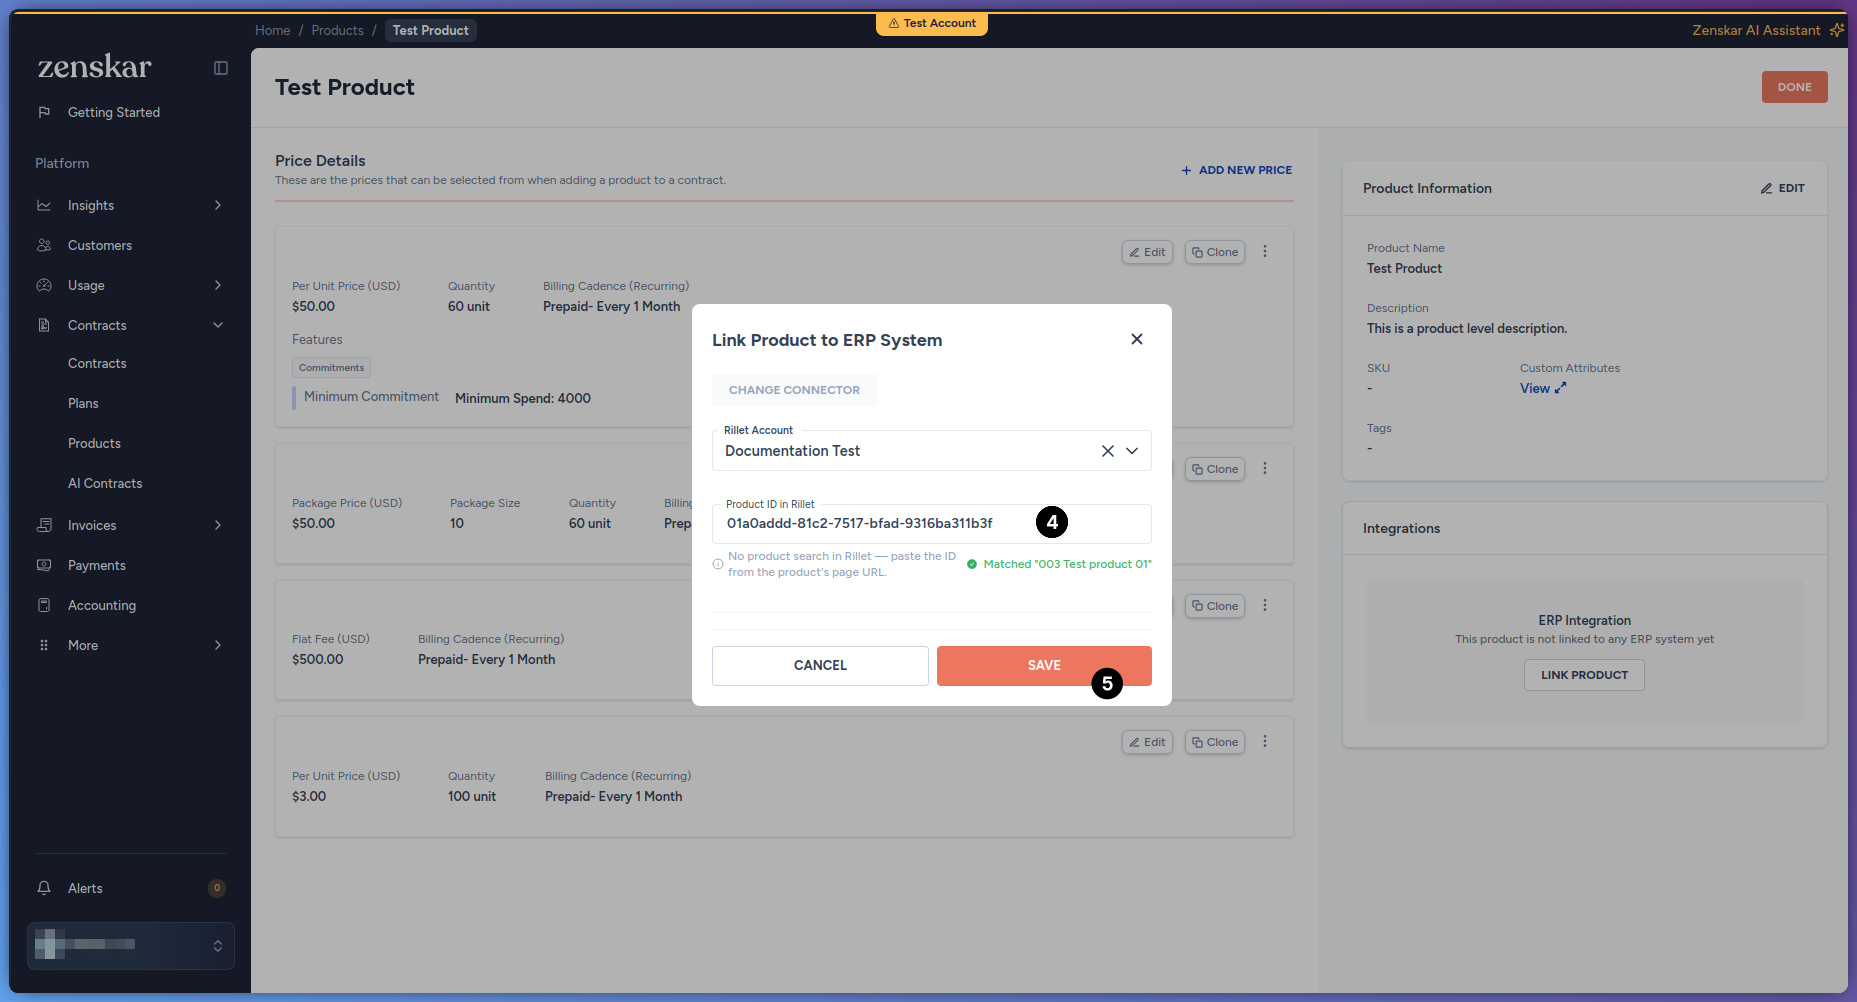 Rillet has no product search by name, so this ID cannot be looked up by typing the product’s name. Once you paste a valid ID, Zenskar shows the matched Rillet product’s name to confirm you pasted the right one.
 -
Save the mapping.
Features
Payment backsync is not yet available to every organization. Contact Zenskar to have it enabled for yours. When enabled, a Rillet webhook triggers the sync whenever a payment changes in Rillet. The invoice must already be synced and mapped to Rillet. The Zenskar invoice must be approved or partially paid. Based on the payment’s status in Rillet, Zenskar creates a new payment, voids a previously synced one, or leaves the existing payment unchanged. An amount larger than the remaining invoice balance is recorded as unallocated cash, with an alert, instead of being rejected.