

Concepts
Objects
Zenskar maps three of its objects to HubSpot objects. Each is configured on its own tab in the connector settings and enabled independently.
A Zenskar contract is assembled from a HubSpot deal together with the deal’s line
items and one of its associated companies.
Sync direction
Each object has an independent sync direction.
All three values are available for every object, but each one defaults to a
particular direction in practice:
A HubSpot connection binds to exactly one portal. The Connections page has no
New Connection action for HubSpot.
How-to guides
Connect
This procedure connects one HubSpot portal and configures object sync. Complete the steps in order.Prerequisites
- A HubSpot account with permission to authorize app installations for the target portal.
- A Zenskar account that can manage integrations.
- At least one Zenskar business entity. A connection cannot be activated until a business entity is assigned to it. The business entity assigned to the connection must be the default business entity in Zenskar.
Step 1: Create the contract date properties in HubSpot
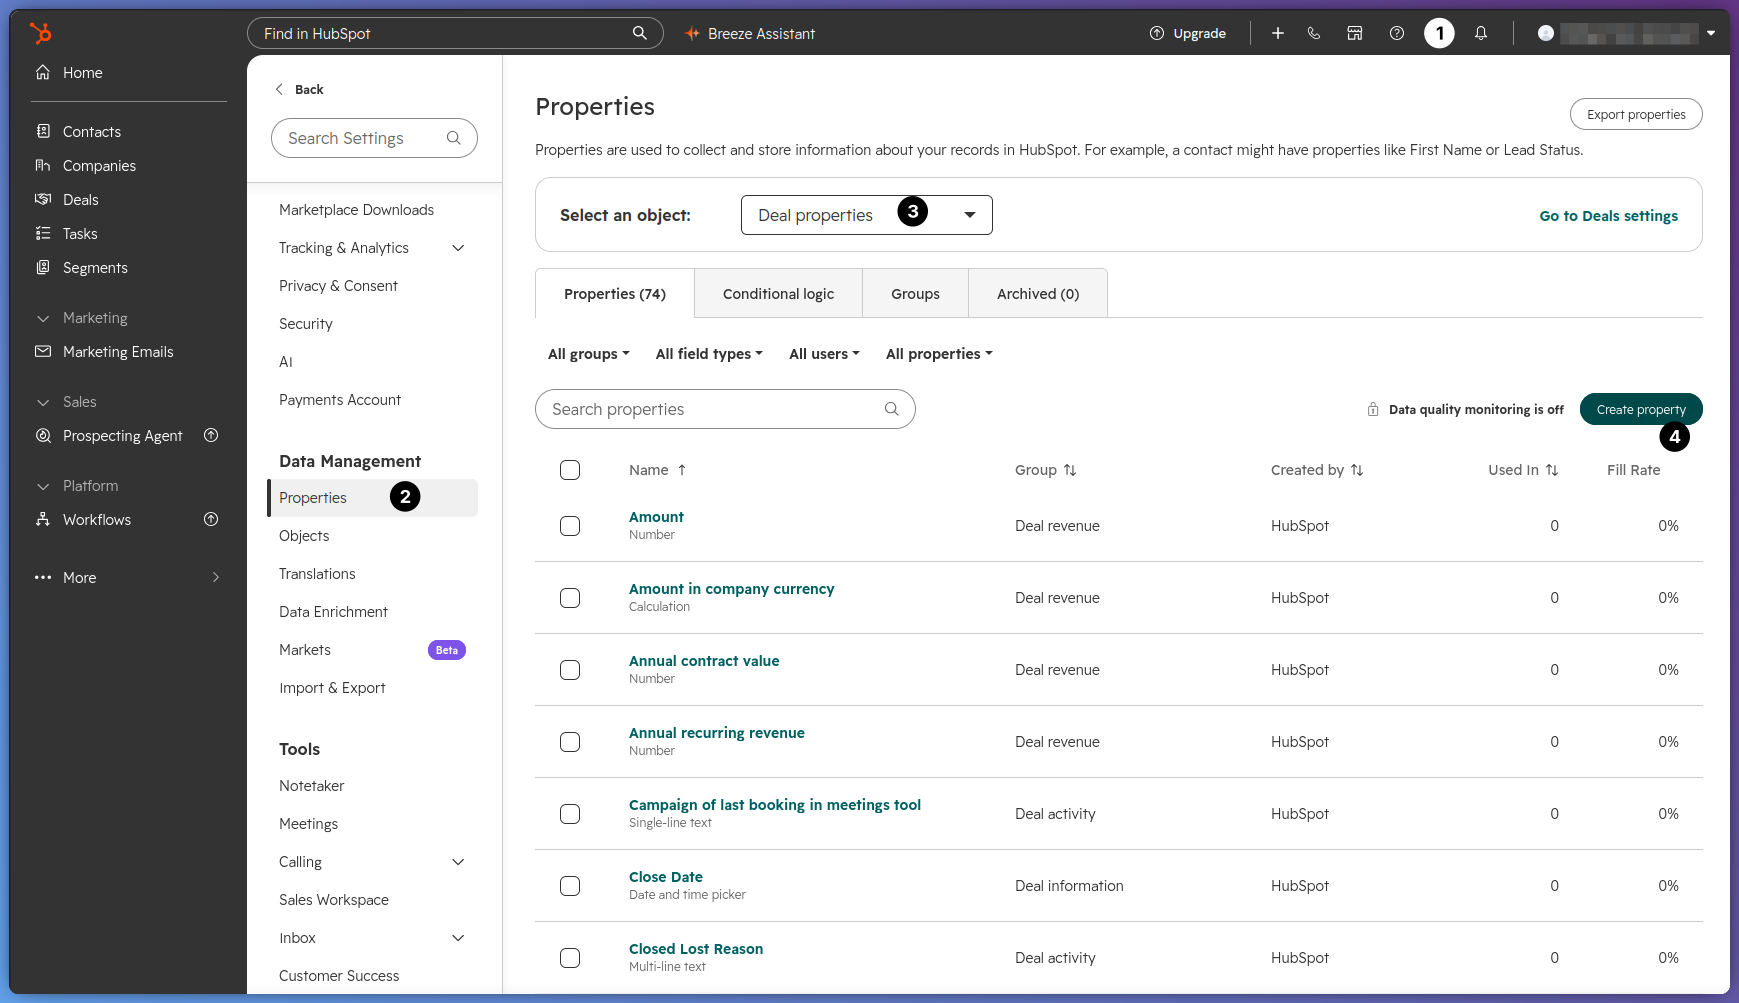
Zenskar sets a contract’s start and end dates from properties on the HubSpot deal, which has no native contract-date property. Skip this step if you aren’t syncing contracts.- In HubSpot, open the Settings menu from the top navigation bar.
- In the left sidebar, select Properties.
-
In the Select an object dropdown, choose Deal properties, then click
Create property.
-
Create the following two properties. For each, set Field type to Date
picker and enter the Property label exactly as shown, then click
Create property.
Step 2: Connect the HubSpot portal
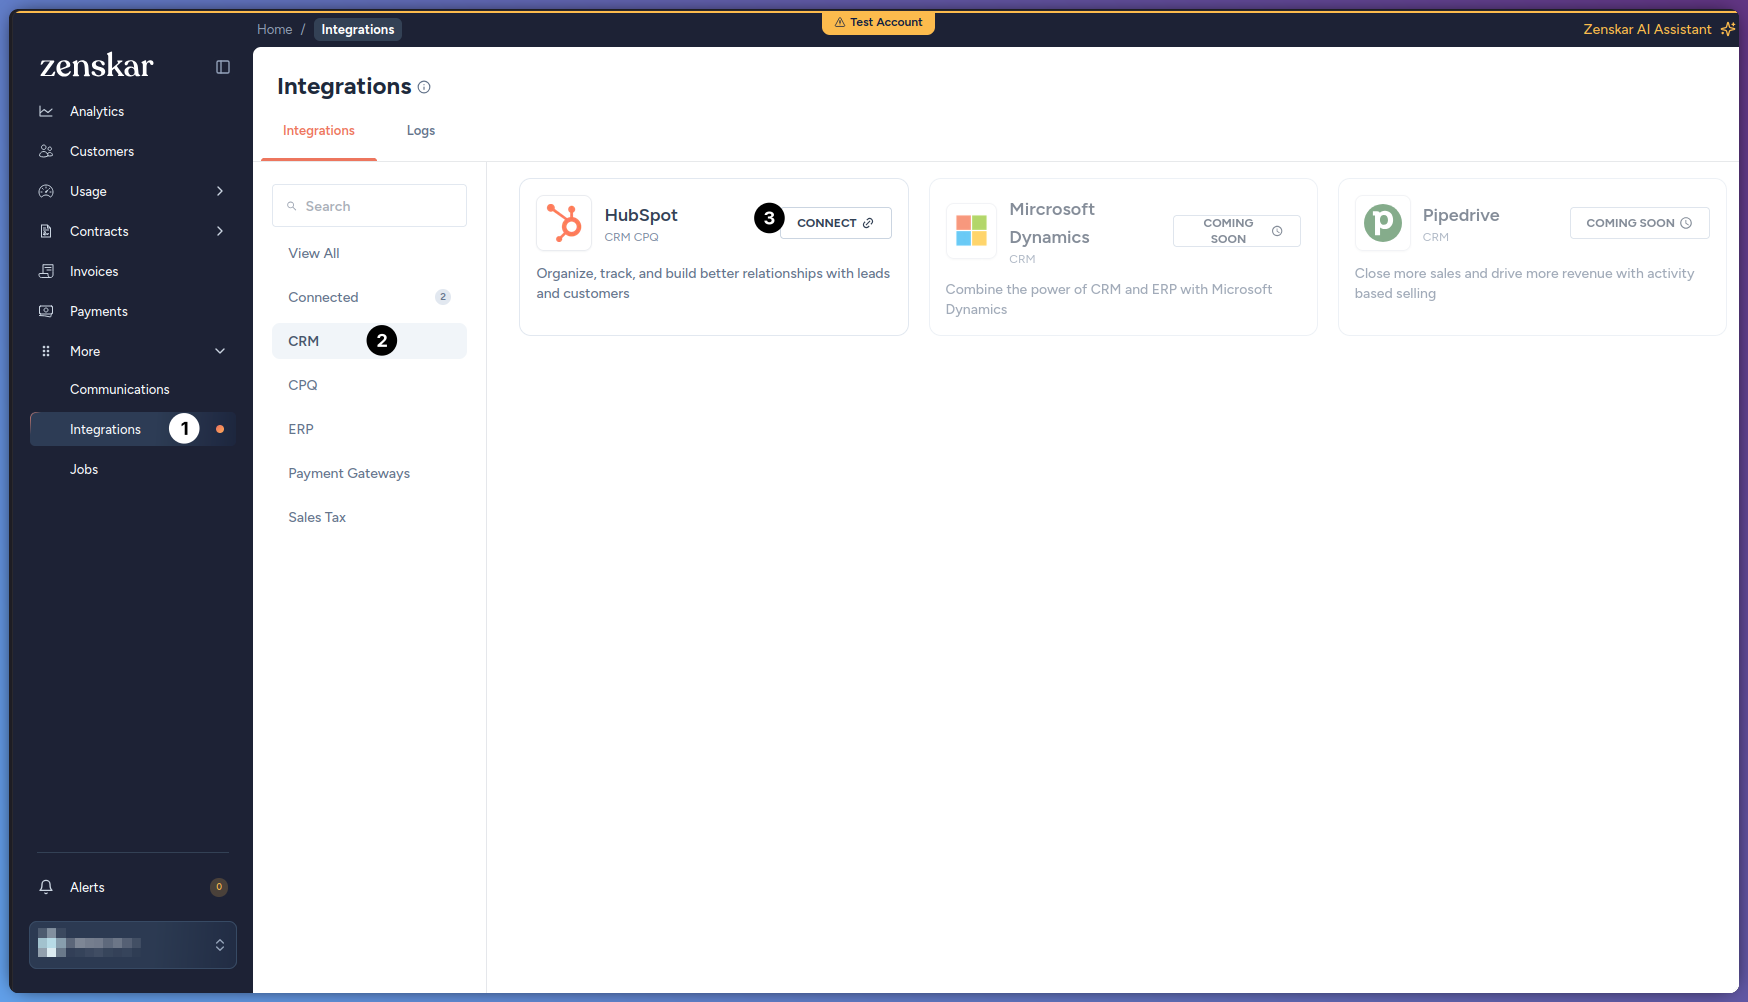
Connecting authorizes Zenskar to access one HubSpot portal through OAuth 2.0. No API key or secret is entered into Zenskar.- In the Zenskar sidebar, open More > Integrations.
- On the Integrations tab, select the CRM category.
-
On the HubSpot card, click Connect.
- In the confirmation dialog, click Connect.
- Sign in to HubSpot with an account that can authorize app installations, and approve the requested access.
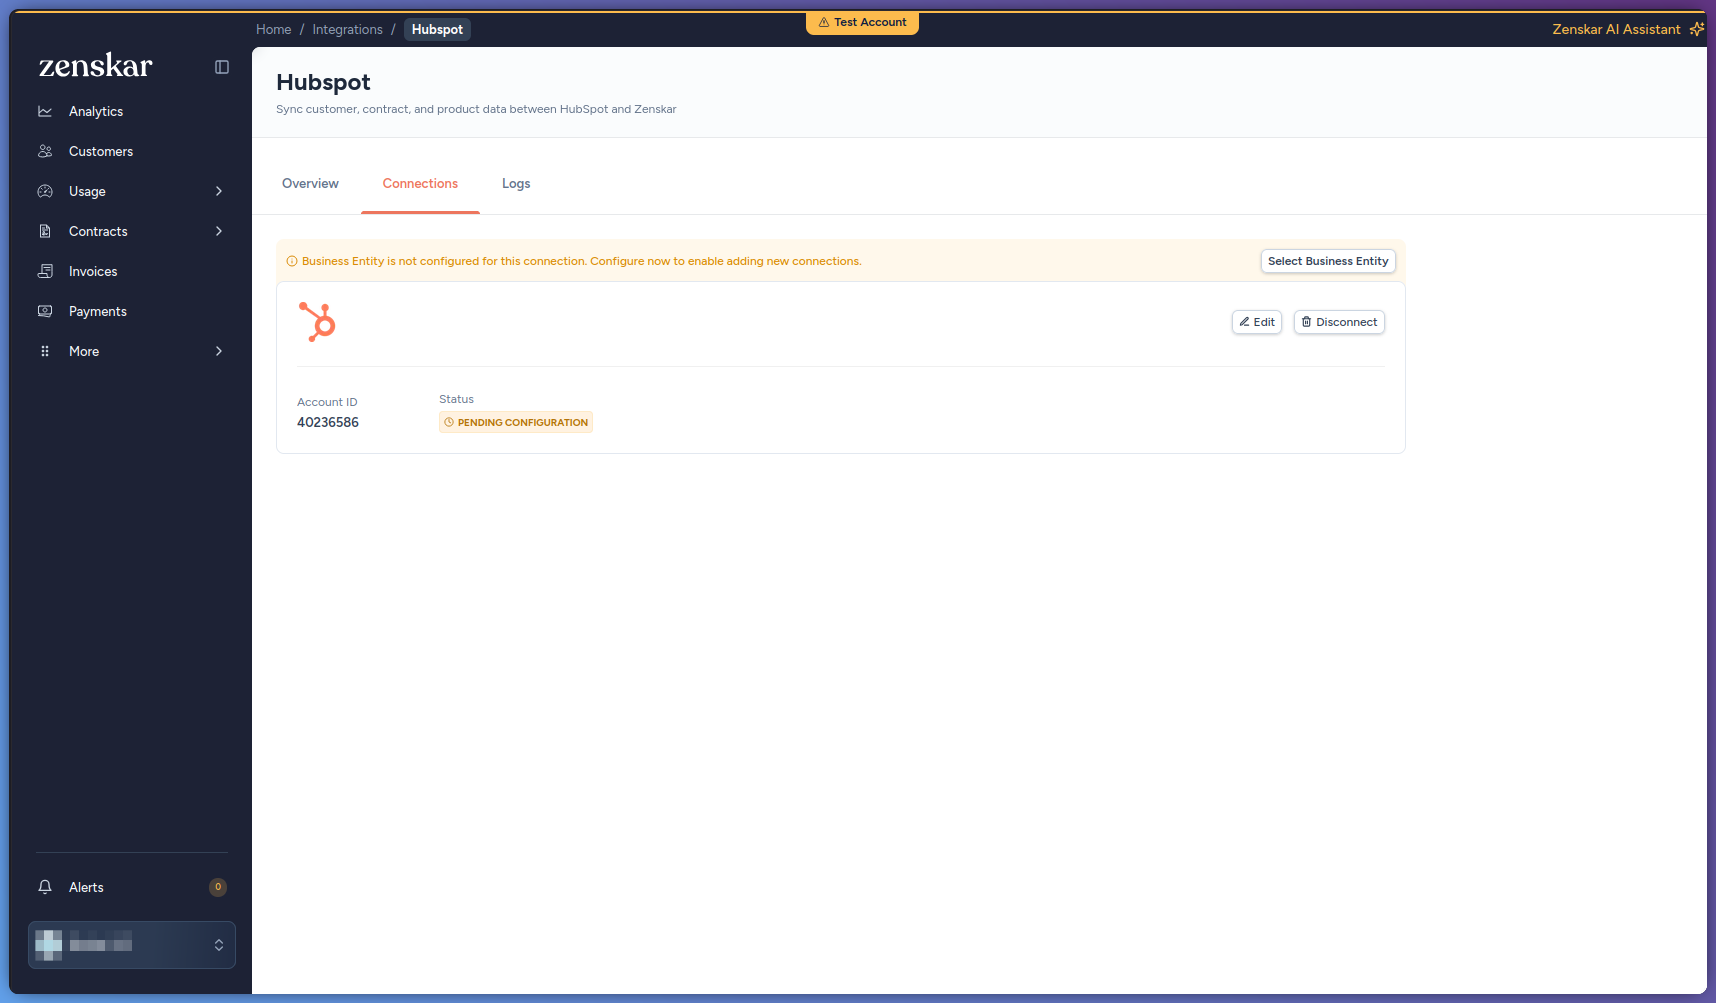
- HubSpot redirects back to Zenskar. The connection appears on the Connections tab with the status Pending Configuration.
Step 3: Assign a business entity
Each connection maps to exactly one Zenskar business entity. The connection cannot be configured until one is assigned.- On the Connections tab, locate the connection.
- Click Select Business Entity and choose the Zenskar business entity that this portal represents.
Step 4: Configure object sync
Open the configuration screen and, for each object type, set its sync direction and field mapping. The three tabs are saved together.- On the Connections tab, click Edit on the connection. The configuration screen opens with the Customers, Products, and Contracts tabs.
- On a tab, set the Sync toggle to Sync ON.
- Select a sync direction: Import only, Export only, or Import & Export.
- On the Products and Contracts tabs, optionally add Sync Condition Filters. Each condition is a field, an operator, and a value; multiple conditions are combined with AND. For contracts, a deal is imported only when every condition is satisfied.
- Under Field Mapping, open each group in the left sidebar and map its rows. Each row binds a Zenskar field to a HubSpot field, with an optional default value applied when the HubSpot field is empty. The HubSpot field list is read from the connected portal, so custom properties are selectable.
- Repeat steps 2 through 5 for the other tabs, then click Save Configuration.
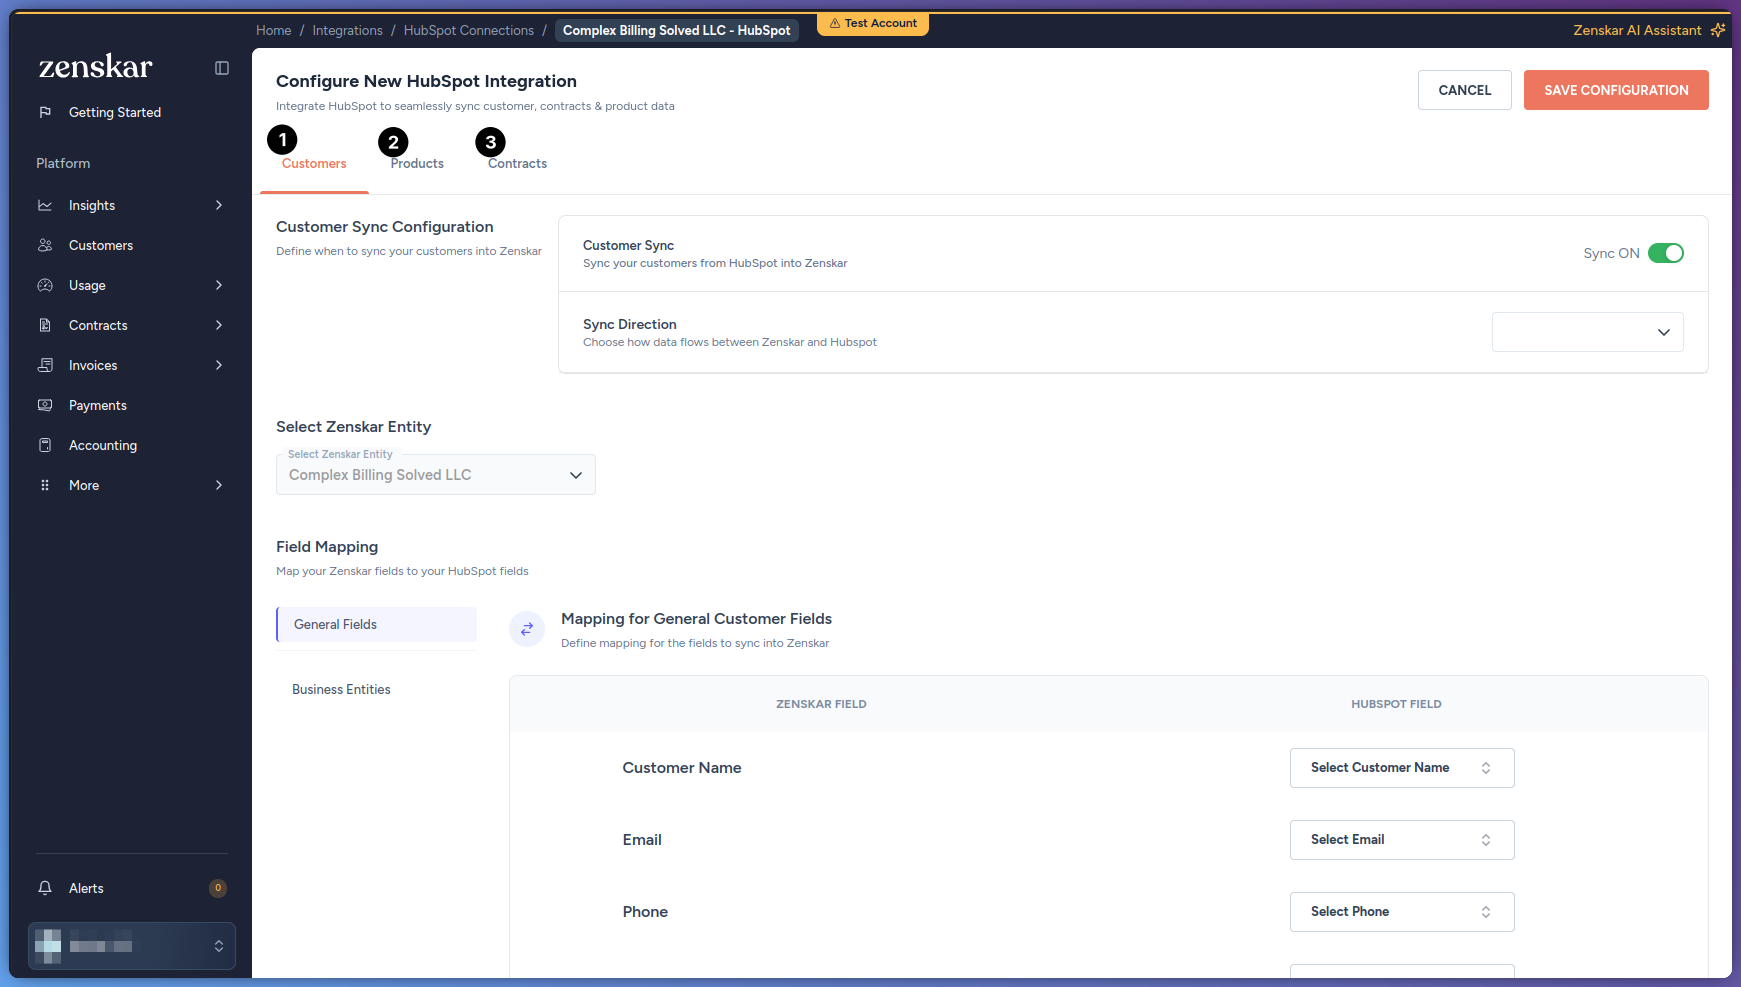 The Customers tab is shown above as a representative example. Products and
Contracts follow the same pattern, with a Sync Condition Filters section and
different Field Mapping groups. See the full layout of each tab below.
The Customers tab is shown above as a representative example. Products and
Contracts follow the same pattern, with a Sync Condition Filters section and
different Field Mapping groups. See the full layout of each tab below.
Customers tab
Products tab
Contracts tab
Step 5: Verify the sync
- In HubSpot, make a qualifying change: create or update a company, or move a deal into a state that satisfies the contract filters.
- In Zenskar, open More > Integrations, select HubSpot, and open the Logs tab.
- Confirm a sync event with the status Success for the record. Select the event to inspect its Request and Response.
- If an import event has the status Failed, open it to read the error reason. After resolving the cause, click Retry to reprocess the event.
Disconnect
- On the Connections tab, click Disconnect on the connection.
- In the confirmation dialog, which states that all resource mappings will be deleted, click Delete.
- Removes the connection and the resource mappings linking Zenskar records to their HubSpot counterparts.
- Leaves the Zenskar records and the HubSpot records intact.
- Triggers HubSpot to notify the portal that the app was uninstalled, with a reinstall link sent to its super admins.
There is no separate re-authenticate action. HubSpot access tokens refresh
automatically in the background; if that stops working (for example the portal
revoked Zenskar’s access, or a scope changed), disconnecting and reconnecting is
the only recovery path.
Reference
Field Mapping columns
Every group under Field Mapping is a table with three columns.Customers tab
The Customers tab has no Sync Condition Filters section.
Products tab
Contracts tab
Each pricing model or feature added brings its own set of mapping rows.