

In summary, access to a resource is protected by both authentication and authorization: you have to prove your identity and possess appropriate permissions to interact with resources
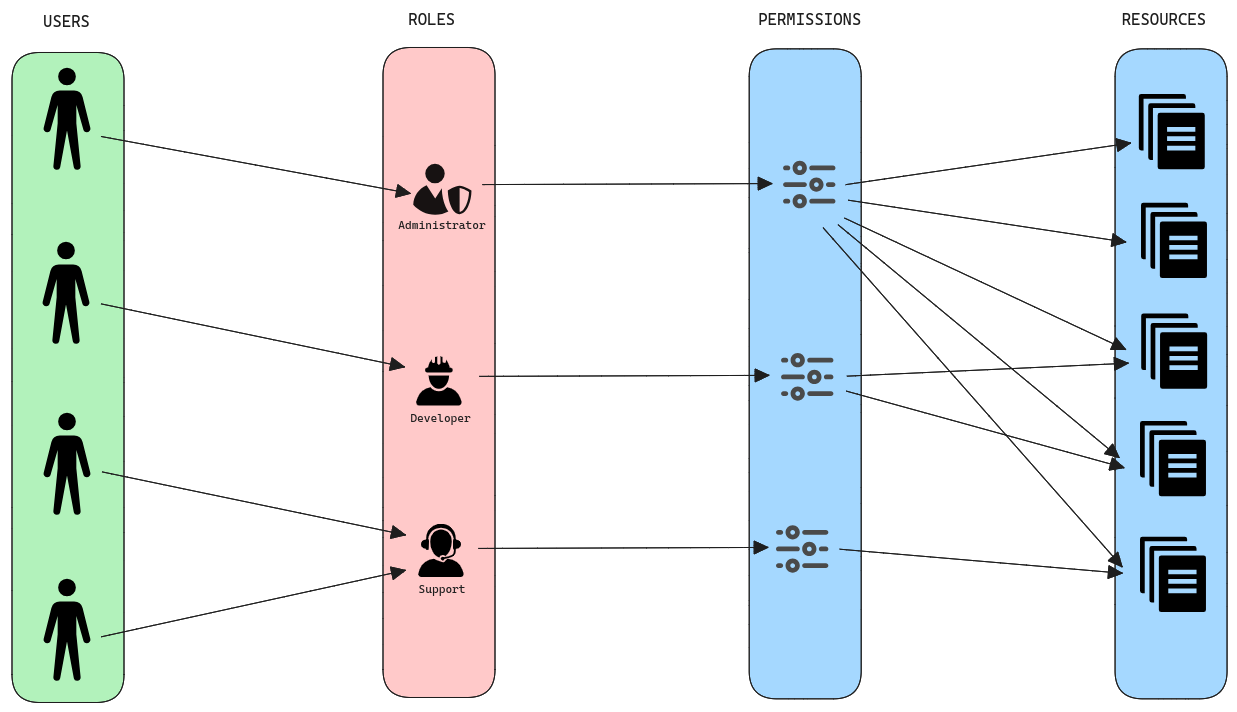 Important concepts are summarized in the table below:
How to add a new role?
- Click on the named drop-up menu located at the bottom of the side panel, and click on Roles.
- Click on the + ADD NEW ROLE button.
- Enter the new role name.
- Grant required permissions to the role by selecting permissions from the AVAILABLE PERMISSIONS list and adding them to the GRANTED PERMISSIONS list.
- Click ADD ROLE.
🚧 Choose all permissions The option to choose all permissions must be used with caution. The user attains unlimited power.
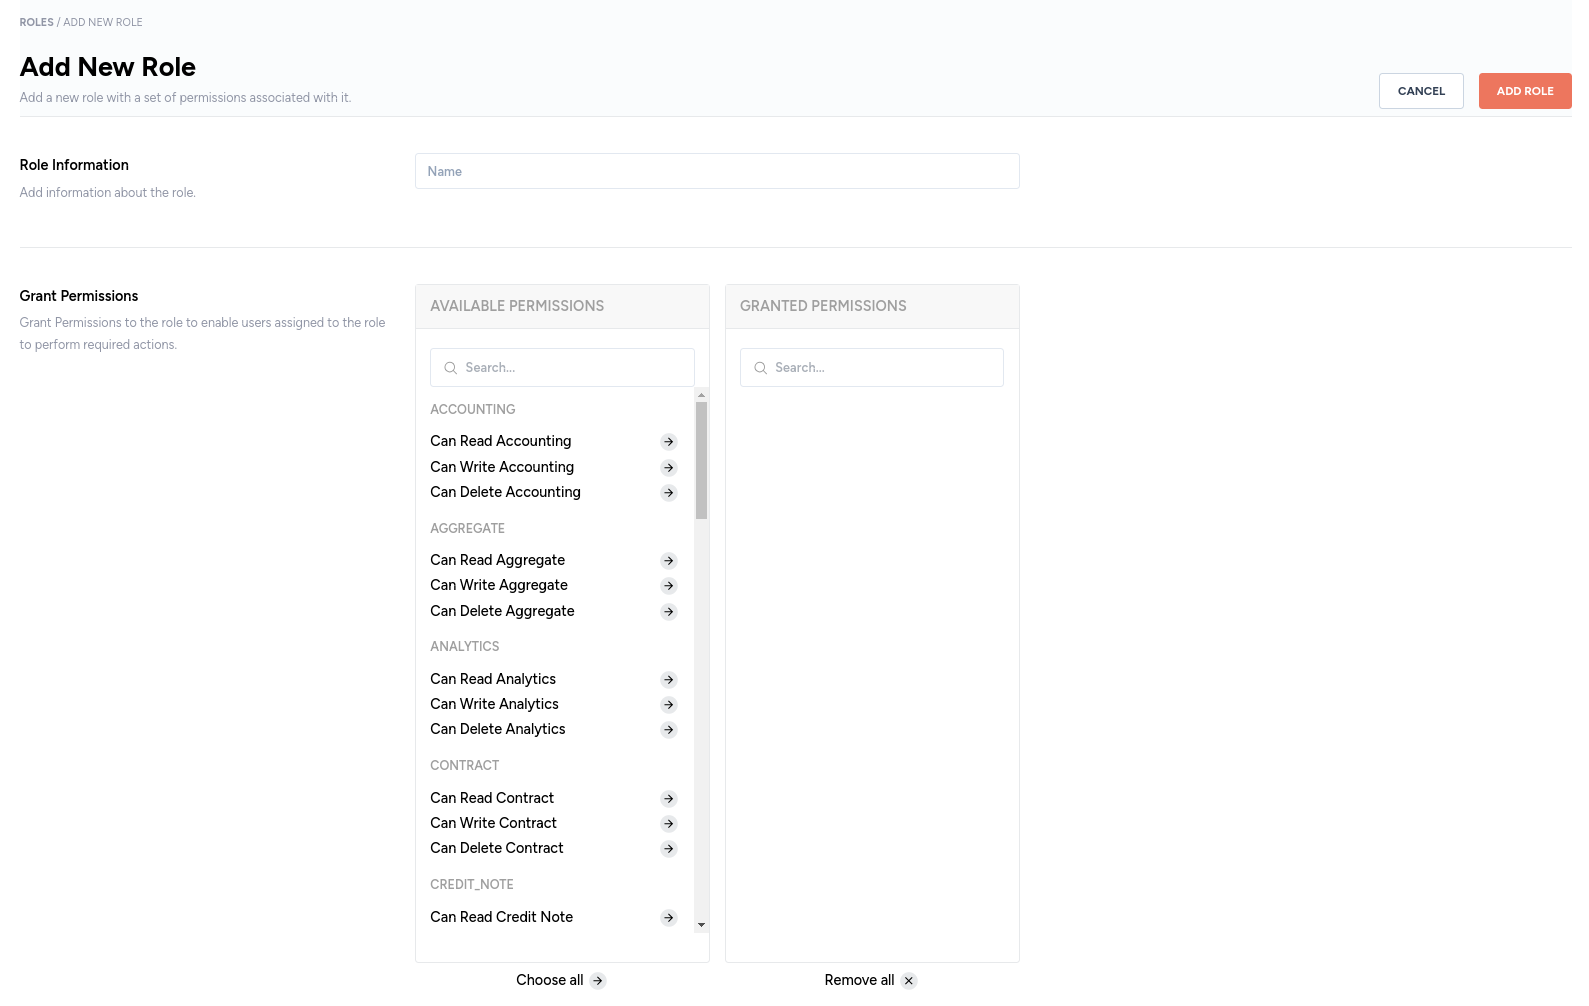
Available permissions
The permissions are of the form: Can Read <RESOURCE>Can Write <RESOURCE>
Can Delete <RESOURCE>
📖 Can Approve <RESOURCE> permission There is also a Can Approve<RESOURCE> permission applicable only to invoices.
How to update a role?
- Click on the named drop-up menu located at the bottom of the side panel, and click on Roles.
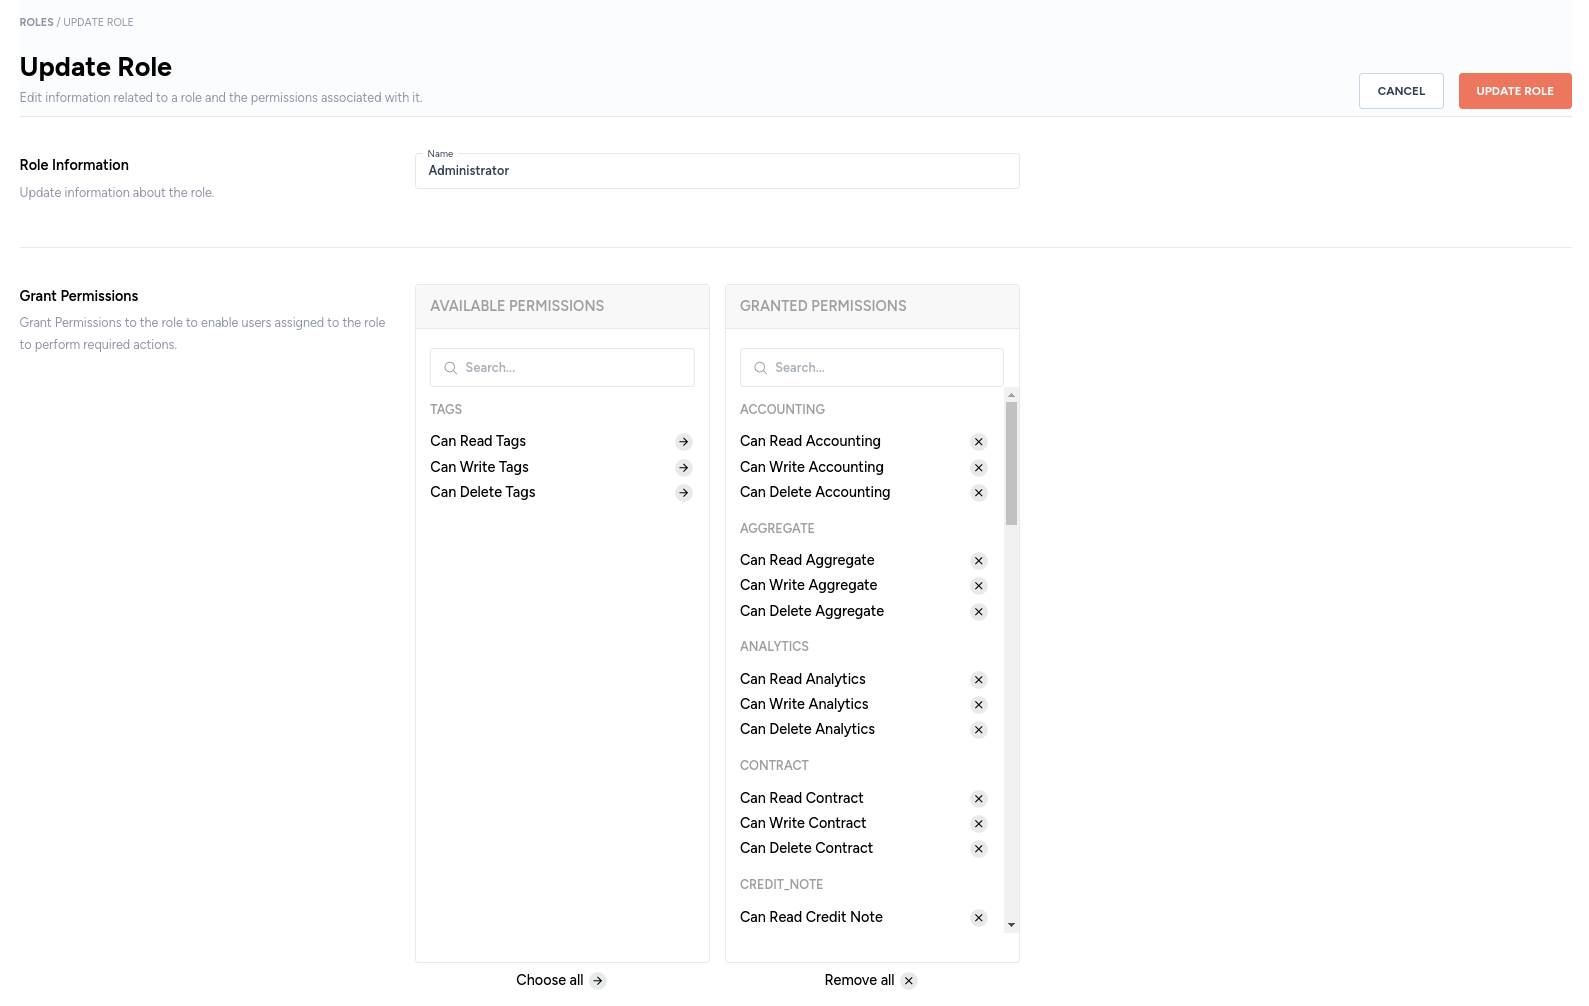
- From the roles listed on the page, click on the role you wish to edit.
- Make the necessary edits and click the UPDATE ROLE button.
How to delete a role?
- Click on the named drop-up menu located at the bottom of the side panel, and click on Roles.
- Each row on the Roles page has a kebab menu. Clicking on the kebab menu will display the option to delete a role.

🚧 Caution A user can be granted more permissions than allowed by a role. Deleting a role will revoke the permissions granted to user by the role. However, the user will retain the extra permissions.