> ## Documentation Index
> Fetch the complete documentation index at: https://zenskar.com/docs/llms.txt
> Use this file to discover all available pages before exploring further.
# NetSuite
## Prerequisites
Zenskar uses token-based authentication (TBA) for connecting with a NetSuite account. You must enable a few features in NetSuite before attempting to connect Zenskar with NetSuite:
1. On the NetSuite dashboard, go to **Setup** > **Company** > **Enable Features**.
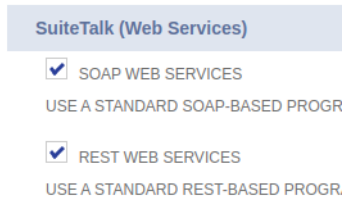
2. On the horizontal menu, go to **SuiteCloud**. Now go to the **SuiteTalk (Web Services)** subsection and select **REST WEB SERVICES**.
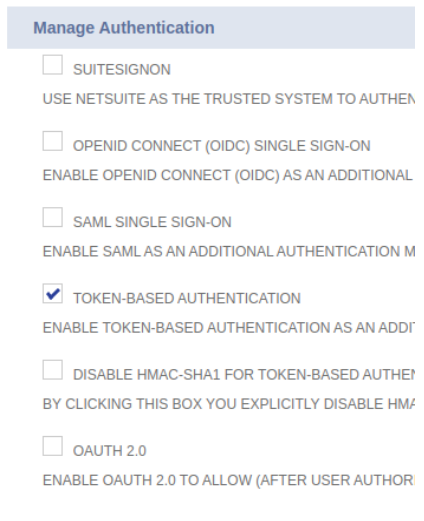
3. Go to the **Manage Authentication** subsection and select **TOKEN-BASED AUTHENTICATION**.
4. Save the changes.
5. Create a new integration which will handle all requests from Zenskar. For creating a new integration, go to **Setup** > **Integration** > **Manage Integrations** > **New**.
6. Give a suitable name to integration and leave the state as enabled. Now set the authentication settings, as shown below.
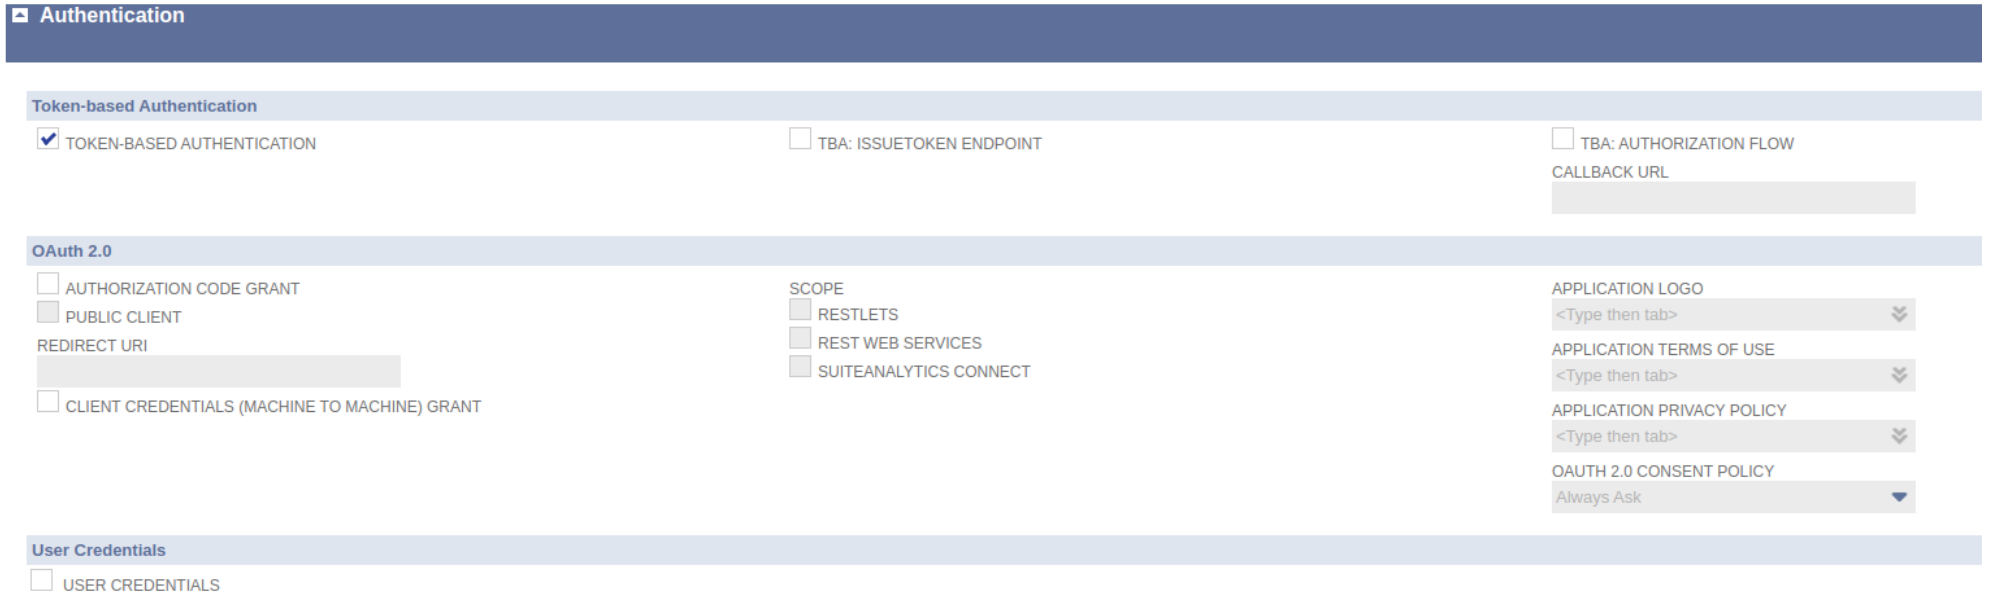
7. Save the integration. After saving, you would be provided the consumer key and consumer secret for the integration. Please note this.
8. In the next step, we will issue an access token to a user which is already added to the client’s NetSuite account. Before issuing the access token, please ensure the user has all the necessary permissions to use Rest Web Services. More details about the user roles on Netsuite can be found here.
9. For issuing the access token, from the NetSuite homepage scroll down and in the bottom left corner you can find Settings. Go to **Settings** > **Manage Access Tokens**. Now choose the integration that was created in the previous setup and appropriate token name. Once done, you would be provided with the Token Id and Token Secret. Please note them as well.
10. Clients also need to note the NetSuite account id and company URL which could be found inside the **Setup** > **Company** > **Company Information**. Account ID will be visible on this page. Go to the **Company URLs** sub tab to get the company URL. Please note the company URL corresponding to **SUITETALK (SOAP AND REST WEB SERVICES)**.
## Integrate NetSuite with Zenskar
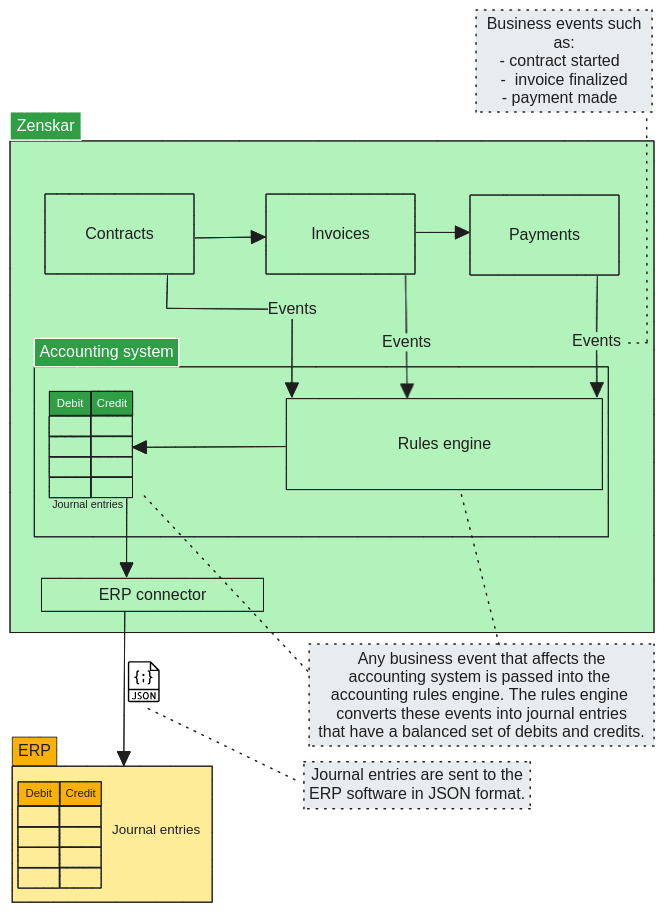
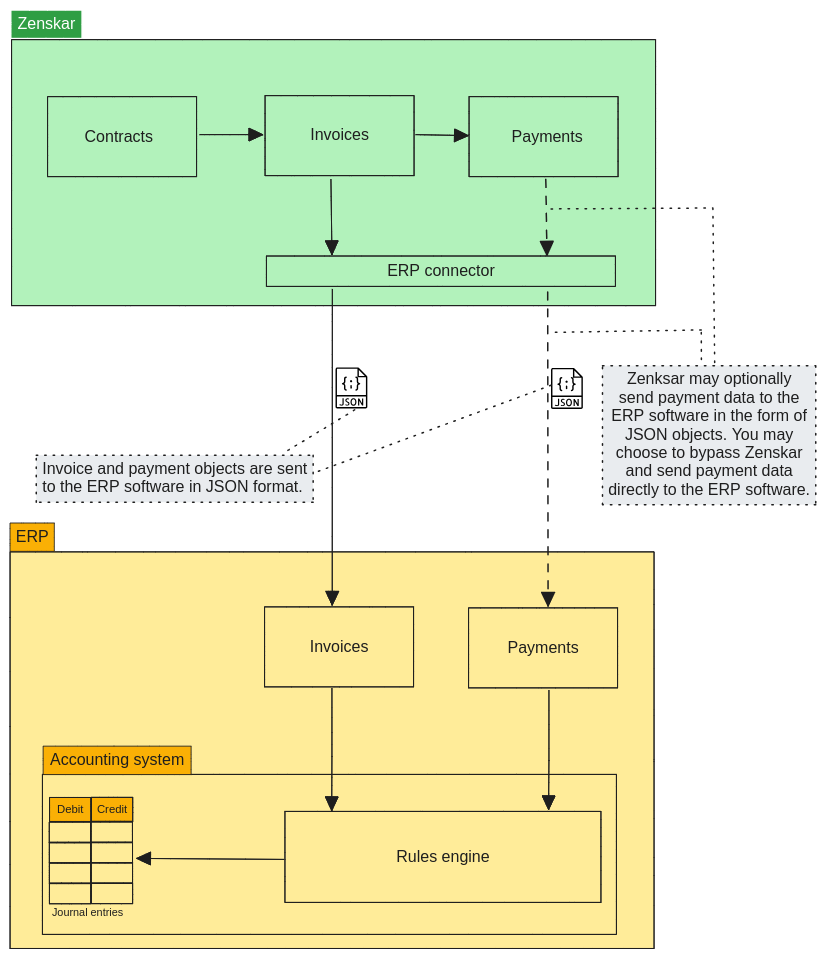
### Option 1: use Zenskar's accounting system to generate double-entry journal entries
You may use Zenskar's accounting system to generate double-entry journal entries. These [journal entries can be synced with NetSuite](/docs/20240301/third-party-integrations/ERPs/netsuite#option-1-use-zenskars-accounting-system-to-generate-double-entry-journal-entries) using Zenskar's NetSuite connector.
### Option 2: use the accounting system of the ERP software
You may use the accounting system of the ERP software to generate journal entries. [Zenksar can send data related to invoices and payments (optional) to NetSuite](/docs/20240301/third-party-integrations/ERPs/netsuite#option-2-use-the-accounting-system-of-the-erp-software) as input.
### Set up Zenskar's NetSuite connector
1. Go to **Settings** > **Connectors** and click on **Connect** button for the NetSuite connector card.
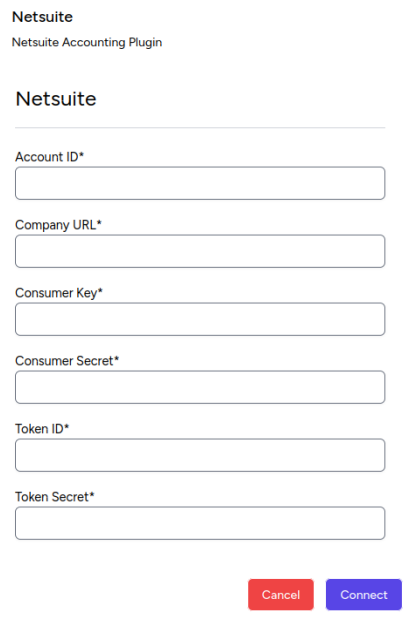
2. Enter the following details:
### Configure Customer Sync
1. Once NetSuite gets connected, click on the **Manage** button to configure the customers sync.
2. Turn on the Customer Sync on the configuration page
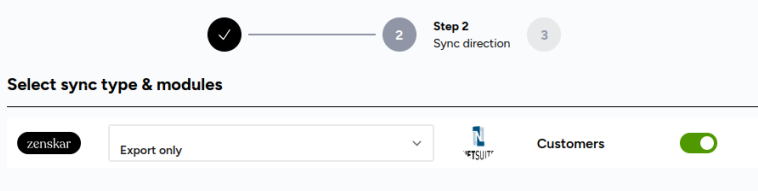
3. Click on Next. On this page the client needs to select the Company subsidiary in which all the customers from Zenskar will be created.
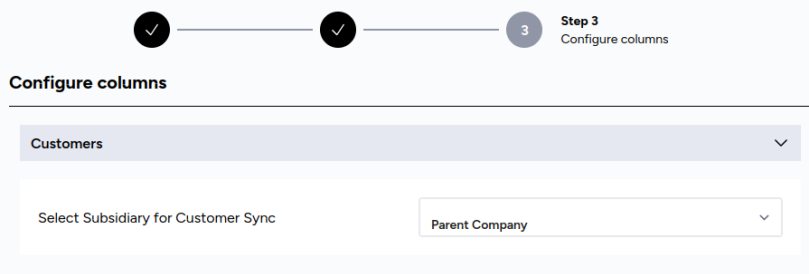
4. Click on Configure and the customer sync is enabled for NetSuite.
Below the sync direction, a **Duplicate Customer Check** card explains that Zenskar matches on the selected field to find an existing record in NetSuite before exporting a customer, so you avoid creating duplicates. This matching is always on. There's no way to disable it, since NetSuite's connector always applies a default match field even if you don't pick one.
Pick a field from **Match By > Select Field**. The selection is pre-filled with your saved choice, then NetSuite's default match field, then the first available option, so leaving it untouched still relies on NetSuite's default behavior.
If you select **email** as the match field, deduplication automatically falls back to matching by customer name for any customer without an email address.
### Configure Invoice Sync
1. Under **Data Sync Setup**, turn on **Invoices** to expand its configuration.
2. Select the **sync direction** and configure the invoice field mapping as needed.
3. If your NetSuite connector supports tax schedules, a **Tax Schedule** row appears below the mapping, labeled "Select a tax schedule applied to products created in NetSuite." Pick one from the **Select Tax Schedule** dropdown. Zenskar applies this schedule to the products it creates in NetSuite for invoice line items.
* While schedules are loading, the row reads **Loading tax schedules…**.
* If NetSuite has no tax schedules configured, the row reads **No tax schedules found in NetSuite. Create one in NetSuite, then refresh this page.**
* If the fetch fails, the row reads **Couldn't load tax schedules.** with a **Retry** link to try again.
* If a previously selected tax schedule is later removed from NetSuite, Zenskar clears the saved selection and shows a notice asking you to re-select one.
4. When the Tax Schedule dropdown is present, a schedule is required. Zenskar blocks saving and flags the field until one is selected.
5. Click **Save Configuration**.
The Tax Schedule dropdown only appears for connectors whose Zenskar integration supports tax schedules. Not every ERP connector has this capability.