> ## Documentation Index
> Fetch the complete documentation index at: https://zenskar.com/docs/llms.txt
> Use this file to discover all available pages before exploring further.
# Installation and setup of Zenskar’s package for Salesforce
> Set up the Zenskar package for Salesforce with this step-by-step guide. Learn installation, configuration, and integration best practices.
## Overview
Salesforce package provided by Zenskar allows you to sync your Salesforce account with Zenskar and the flexibility to automate your processes using [Flow](https://developer.salesforce.com/developer-centers/flow).
***
## Prerequisites
1. You must have permission to install packages in your Salesforce account.
2. You must obtain an API key from Zenskar. Refer to [How to manage API keys](/docs/20240301/product-modules/settings/api-keys) for details.
3. Get your organization Id by navigating to the **General** tab on the **Settings** page.
***
## Installation
1. Reach out to [help@zenskar.com](mailto:help@zenskar.com) for the Salesforce package download link.
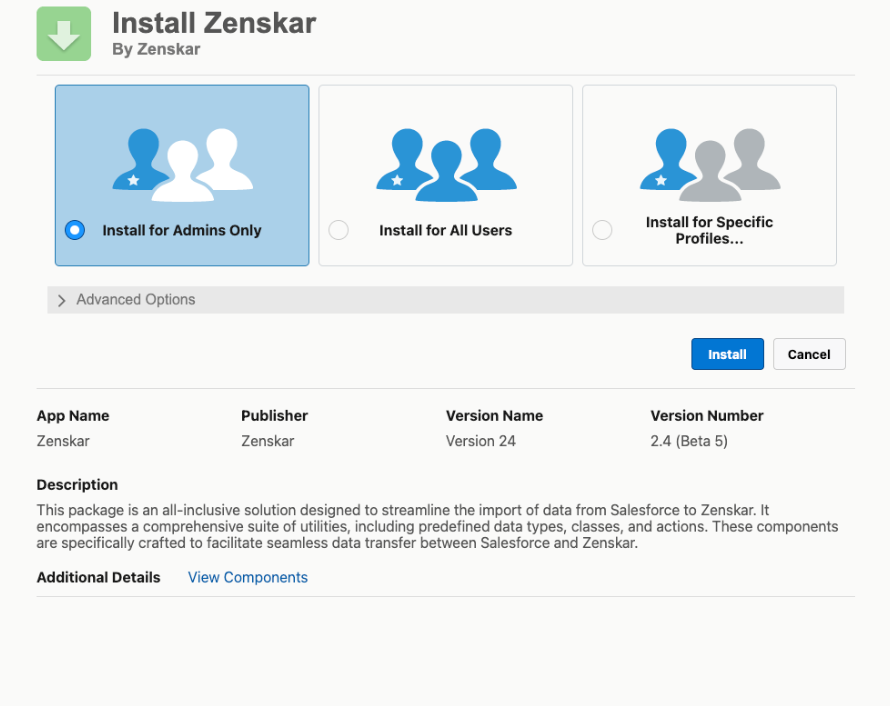
2. You will be redirected to the following screen. You can choose one of the following options:
* **Install for Admins Only**
* **Install for All Users** (recommended)
* **Install for Specific Profiles**
### Note
You must login with an account credential that has the required permissions to install the package.
***
## Configuration
### Configure Zenskar API key and Organisation Id
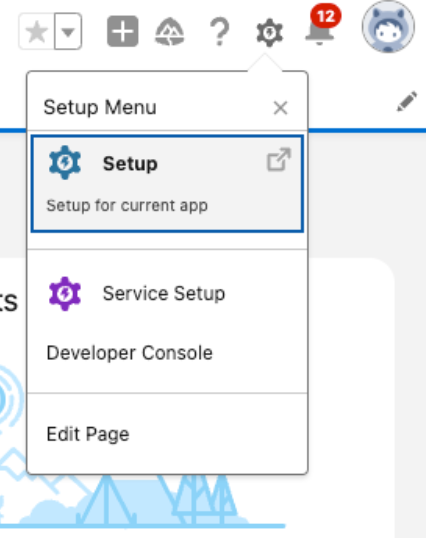
1. On successful installation of the package, navigate to the **Setup Page** on Salesforce.
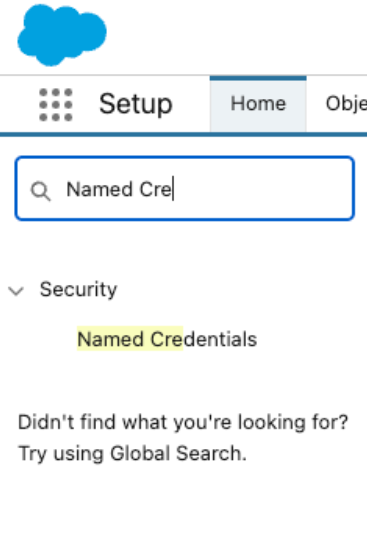
2. Search for **Named Credentials**, as shown below.
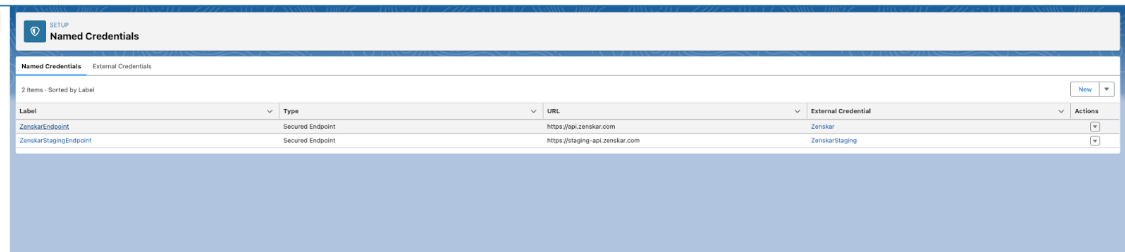
3. In **Named Credentials** you will see the following labels:
* **ZenskarEndpoint**
* **ZenskarStagingEndpoint**
4. Click on the **ZenskarEndpoint** label.
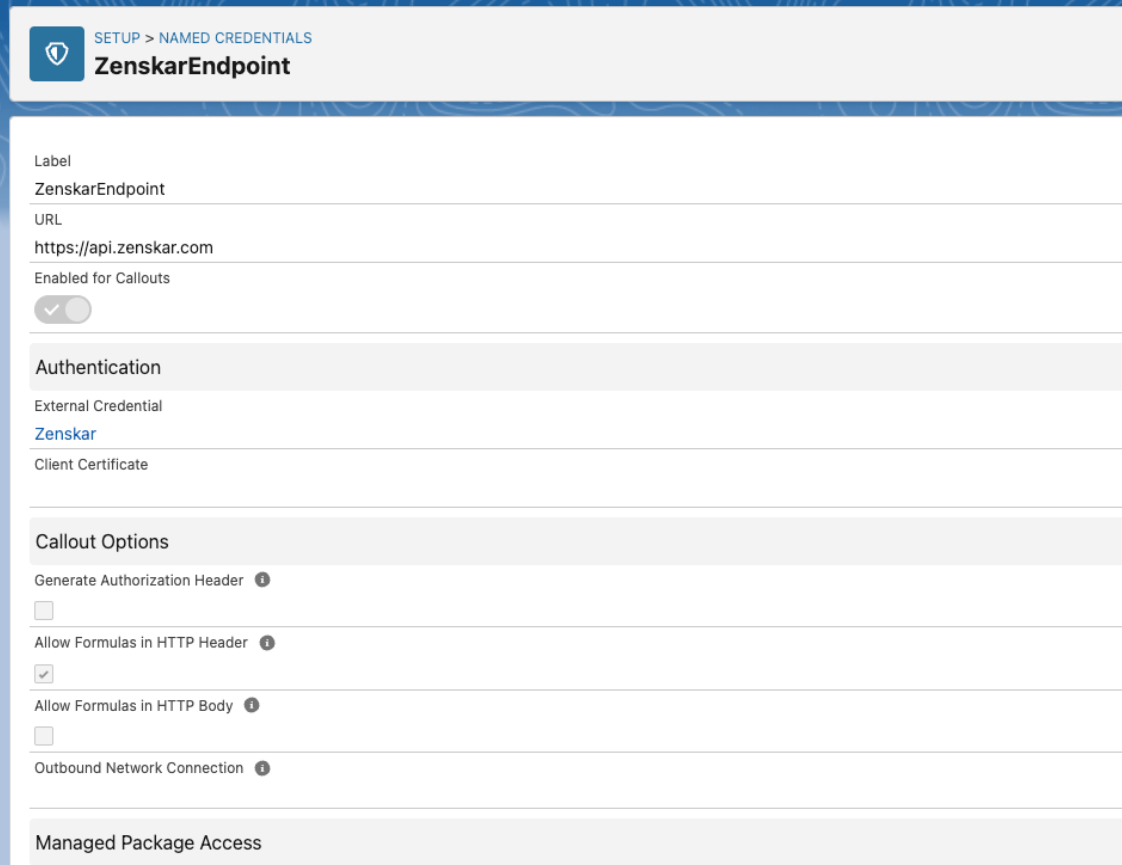
5. On the **ZenskarEndpoint** page\*\*,\*\* click on the value under **External Credentials** in the **Authentication** section\*\*.\*\* The value must be **Zenskar**, if the package was successfully installed.
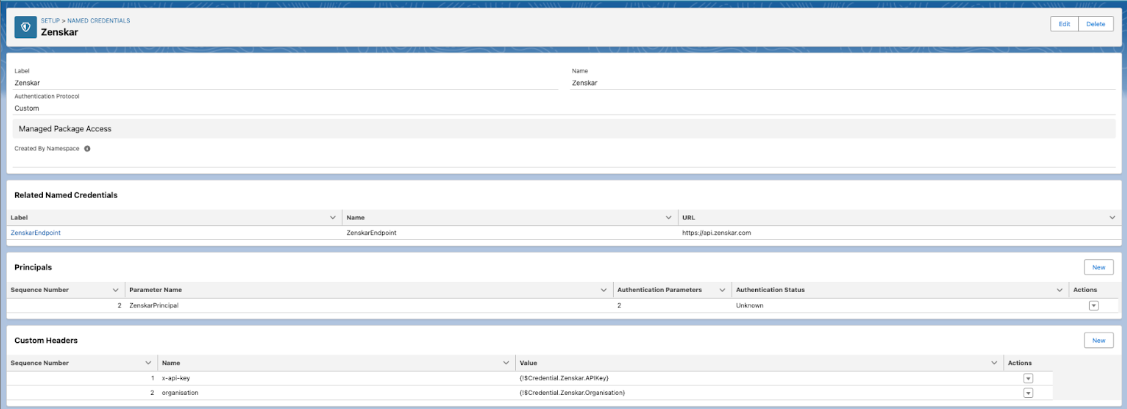
6. On the **Zenskar** named-credentials page, under the **Principals** section, click on the **Actions** drop-down menu available for the **ZenskarPrincipal** parameter.
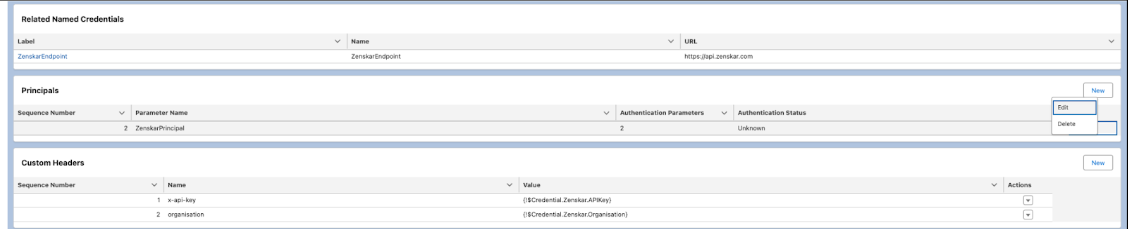
7. Select the **Edit** option from the **Actions** drop-down menu.
8. In the **Edit Principal** modal dialog, add the following Authentication Parameters:
| Parameter Name | Value |
| -------------- | ---------------------------------------------------------------------------------------------------------- |
| APIKey | [Generate an API key in the Zenskar dashboard](/docs/20240301/api-guides/authentication) and enter. |
| Organisation | [Retrieve your organization ID from the Zenskar dashboard](/docs/20240301/api-guides/authentication) and enter. |
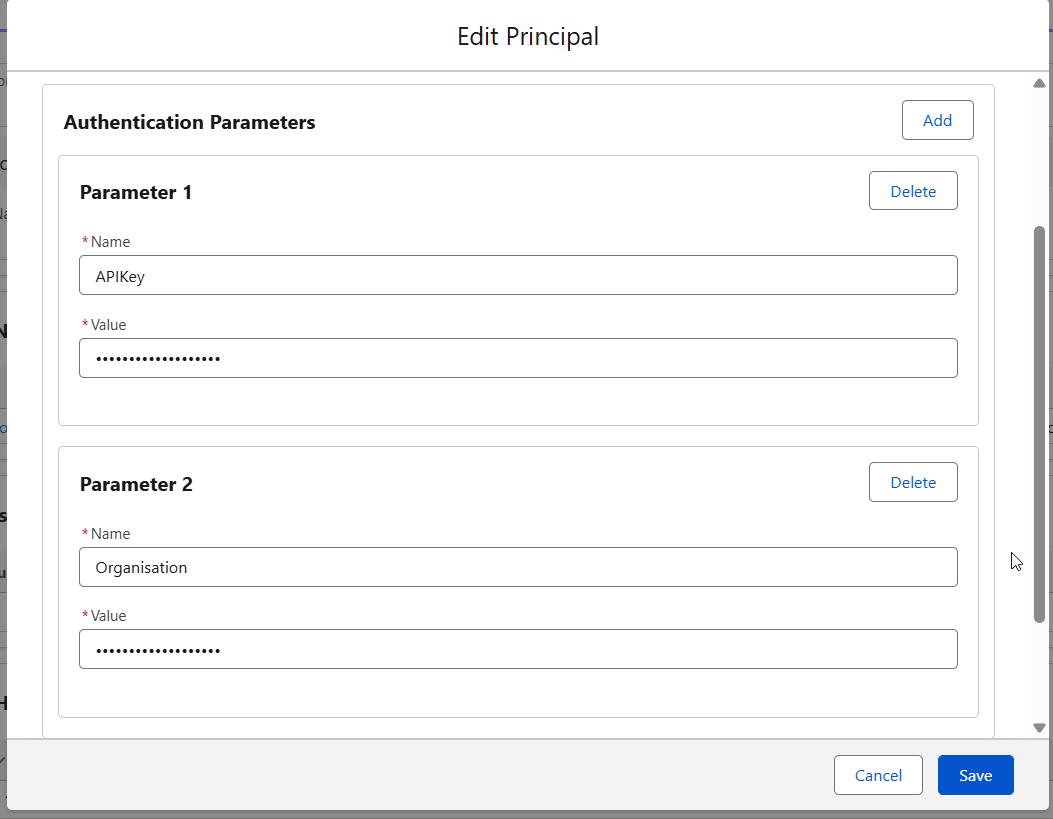
9\. Once added, click on the **Save** button to save the configuration.
***
### Provide permission to users for Zenskar External Principal
*For more information*\
*Refer to this [Salesforce guide](https://help.salesforce.com/s/articleView?id=sf.nc_enable_ext_cred_principal.htm\&type=5).*
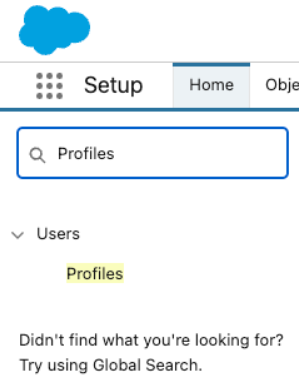
1. On the **Setup** page, search for **Profiles**
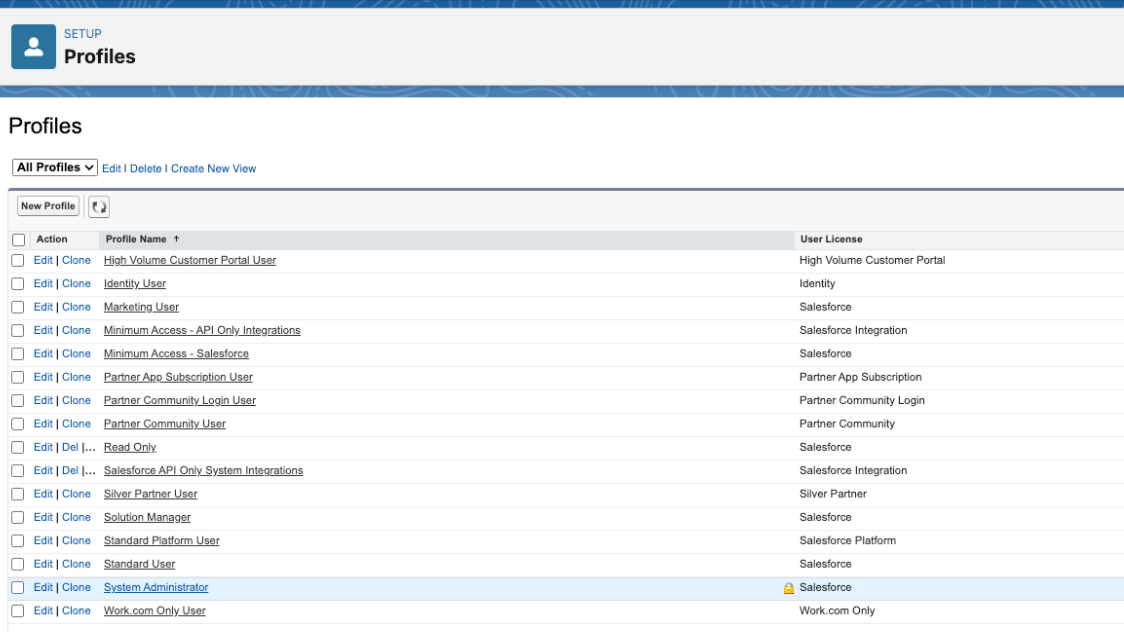
2. On the **Profile** page, search for **System Administrator**, as shown below.
3. Click on the **System Administrator** profile.
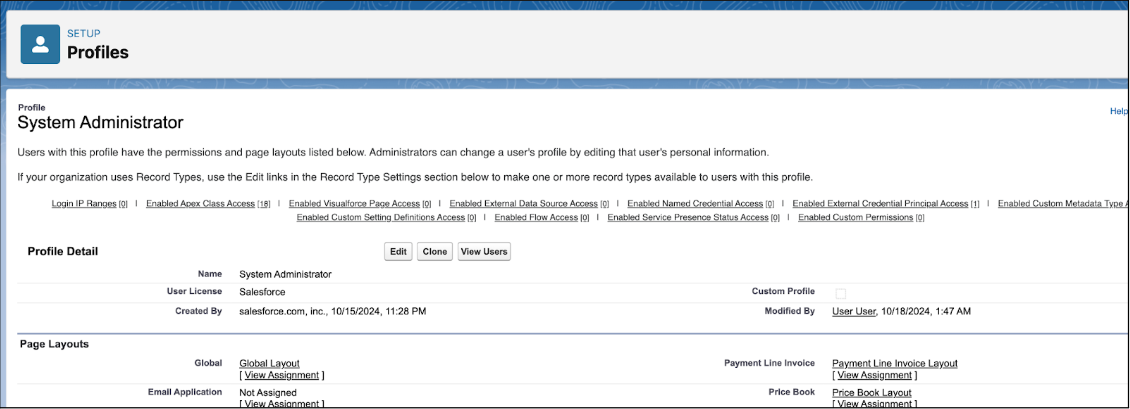
4. You will arrive at the **Profiles** page. Click on **Enabled External Credential Principal Access** to go to the corresponding settings page.
5. Click on the **Edit** button beside the **Enabled External Credential Principal Access** option, as shown below.
6. Select **Zenskar - ZenskarPrincipal** from the **Available External Credential Principals** list.
7. Click on the **Add** button to move the selection from the **Available External Credential Principals** to **Enabled External Credential Principals** list, as shown below.
8. Once moved, click on the **Save** button to save the configuration. Your API keys and Organisation are now ready to use.
### Note
You can repeat the above steps to provide access to other users.
### Set up Salesforce object layout
You can enable **Custom Fields** on **Objects Layout** to allow seamless integration.
#### Available custom fields
| Account |
| ----------------------------- |
| AutoCharge Invoice (Zenskar) |
| CustomerID (Zenskar) |
| Email (Zenskar) |
| Email Communication (Zenskar) |
| External ID (Zenskar) |
| Opportunity |
| ------------------------------- |
| Contract End Date (Zenskar) |
| Contract ID(Zenskar) |
| Contract Renew Policy (Zenskar) |
| Contract Start Date (Zenskar) |
| Product |
| ------------------- |
| ProductID (Zenskar) |
| PriceBookEntry |
| ---------------- |
| LinkID (Zenskar) |
### Note
**LinkID (Zenskar)** acts as the **Reference ID** on Zenskar.
| Needed only if creating per-unit pricing on Salesforce |
| ------------------------------------------------------ |
| Billing Cadence Every (Zenskar) |
| Billing Cadence Offset (Zenskar) |
| Billing Cadence Period (Zenskar) |
| Discount Percentage (Zenskar) |
| Is Recurring(Zenskar) |
| Pricing Unit (Zenskar) |
### Note
If you choose to use Salesforce fields, update Flows accordingly.
1. Go to the **Setup Home** page.
2. Click on **Object Manager** and search for **Account.**
3. Click on **Account** to arrive at the **Account** page.
4. On the accounts page, click on **Page Layouts** in the left sidebar.
5. Click on **Account Layout**, as shown below\*\*.\*\*
6. On the **Account Layout** page, all available fields are shown in the **Account Layout** section, whereas the fields associated with account are shown in the **Account Sample** section.
7. On the **Account Layout** page, move all the fields with **(Zenskar)** suffix to **Account Information** section.
8. Once added, click on the **Save** button.
Successful completion of this activity will make all Zenskar fields available when you create or edit an account on Salesforce.
### Warning
Steps 1–8 must be repeated to show custom fields in the layouts for **Opportunity**, **Product**, and **PricebookEntry** by updating the default/active layout pages for each of these objects.